Showing posts with label Die cutting. Show all posts

Friday, March 1, 2019

Mixed-media junk journal collage with large die cut letter

die cut letter, stefanie Girard, Liberty Sprinkles, junk journal, collage, mixed-media
Yesterday I posted the easiest Lucky St. Paterick's Day banner tutorial and I promised the first of the projects I plan to make with the outside or negative die cut leftover from the letters.

Along with the recycled die cut paper letter I used one of my watercolor pill paintings that are painted with metallic watercolors.
watercolor paintings of pills Stefanie Girard, metallic watercolor paintings
In addition to the pill painting and the negative outline of the die cut letter K leftover from my Lucky banner project I rubber stamped the quote "Think about it". I may add some washi tape or fabric scraps to this junk journal collage art page but for now I like it with just these elements.

How to die cut the easiest St. Patrick's Day Lucky Banner

Lucky St. Patrick's Day Banner, Stefanie Girard, Liberty Sprinkles, Die cut letters
Don't you feel "Lucky" when you are crafting and you get two items out of one action? I love it and that's just what you get when you die cut these letters out of rectangles of pretty green pattern papers to make a St. Patrick's Day banner.
Lucky St. Patrick's Day Banner, Stefanie Girard, Liberty Sprinkles, Die cut letters
Gather up your green printed papers.
Lucky St. Patrick's Day Banner, Stefanie Girard, Liberty Sprinkles, Die cut letters
Then lay out the Lucky 6 inch die cut letters in the order you want the prints to be.
Lucky St. Patrick's Day Banner, Stefanie Girard, Liberty Sprinkles, Die cut letters
I trimmed down each paper to a rectangle and then die cut each 6 inch banner letter centered in the rectangle. This is where you get the second bonus letter to use the negative die cut for another project. I will post the first of those designs tomorrow so be sure to come on back!
Lucky St. Patrick's Day Banner, Stefanie Girard, Liberty Sprinkles, Die cut letters
I use a bit of washi tape to secure the large alphabet die exactly where I want it cut out on the page.
Then I simply used tiny clothes pins on a length of green cotton yarn to hang the big die cut Lucky letters.

If you were wondering- that is my pet rock in a recycled turtleneck sweater I made. The pin says, "Rockin' it old school" (pun intended) I also added a fun shamrock button to the sweater to add a bit more St. Patrick's Day fun to my display.

Wednesday, February 27, 2019

Easy die cut MOM Mother's day card with giant die cut letters

MOM card, Mother's Day card, die cut letters, Stefanie Girard, Liberty Sprinkles
I am thinking ahead to Mother's Day and if you are too how about this for a fun big MOM card that can be made out of virtually any paper combo and I used 6 inch letter dies along with some flower embellishments and a button.
MOM card, Mother's Day card, die cut letters, Stefanie Girard, Liberty Sprinkles
The fun part of this gate fold card is that when it is closed the first and last M of MOM meet to make 1 big M.
MOM card, Mother's Day card, die cut letters, Stefanie Girard, Liberty Sprinkles
I die cut 2 M's out of different striped paper and 1 O out of paper that had all different words for Mother.
MOM card, Mother's Day card, die cut letters, Stefanie Girard, Liberty Sprinkles
I used some old cardstock from the office supply stash I had around for the base of the gate fold card.
MOM card, Mother's Day card, die cut letters, Stefanie Girard, Liberty Sprinkles
I glued each of the M's down to a piece of cardstock in the same mirrored position and folded it down the center of each M and then along the inside edge of the M.
Then I cut a piece of cardstock down to the size of the O and glued them all together.
The then trimmed up the top edge of the card when it was all folded closed.
MOM card, Mother's Day card, die cut letters, Stefanie Girard, Liberty Sprinkles
To add one fun little touch I glued a few layers of pressed flowers together along with a pretty flower button.
If you add a paper clip this can keep the card folded closed too.

Friday, November 24, 2017

How to make a Christmas tree shaker card with heart dies

Heart die cut Christmas tree shaker card Crafter's Companion Stefanie Girard Buttons galore
It can be fun to take basic shapes like a heart and transform it into something like this Christmas tree. The heart dies from Crafter's Companion are mixed-media dies and they cut through cardstock and Fun Foam at the same time which is how you make this shaker card.
Heart die cut Christmas tree shaker card Crafter's Companion Stefanie Girard
First up I die cut the 3 hearts at the same time layering the silver cardstock and Fun Foam.
Heart die cut Christmas tree shaker card Crafter's Companion Stefanie Girard Buttons Galore
Then I glued a piece of recycled plastic container between the silver cardstock and Fun Foam. I played around with different sequins and embellishments from Buttons Galore on the top of the card until I liked the look.
I trimmed the black Fun Foam down to about a 1/4 inch.
Heart die cut Christmas tree shaker card Crafter's Companion Stefanie Girard Buttons Galore

 I then filled the three upside down hearts that formed the Christmas tree with gold sequin mix and glued the green glitter cardstock together.

Then I glued on the half pearls and buttons to the top layer of the card.

This technique for cutting the cardstock and fun foam makes creating shaker cards so easy!


Thursday, September 1, 2016

How to make a paper leather deer die cut cuff bracelet

Sizzix deer die cut paper leather cuff stefanie Girard jewelry
Sizzix paper leather is such a fun material to work with. It die cuts like a dream and one of my all time favorite motifs to use in my art, jewelry making and crafts is a deer and this Tim Holtz Holiday Knit deer sweater like pattern is awesome!

So I thought I'd make a cuff with paper leather and the deer die.
Sizzix deer die cut paper leather cuff stefanie Girard jewelry
The first step was to iron on some Heat n Bond to one side of the gray paper leather.
Then die cut the deer pattern.
Sizzix deer die cut paper leather cuff stefanie Girard jewelry
Peal off the backing paper and iron the gray paper leather to a piece of black paper leather.
Sizzix deer die cut paper leather cuff stefanie Girard jewelry
Cut the cuff to the size you would like it to be on your wrist - I did mine about 2 inches wide but you could make it any width you like.

I rounded the corners a bit and ran it through my sewing machine stitching a row of black stitches along each side about 1/4 of an inch in from each edge.

Use your favorite closure method- Velcro would work great or a button and button hole I bet would work great too.


Monday, August 22, 2016

Election year U.S. map and recycled dictionary page card

U.S. die cut Sizzix America card recycled book page Stefanie Girard Judikins field of stars stencil
I remember being at an election part for Obama's first term and the hostess had a map on a board that was colored in every time a state was announced. This U.S. die cut card is inspired by election year maps.
U.S. die cut Sizzix America card recycled book page Stefanie Girard Judikins field of stars stencil
For the background I used a page from an old dictionary and I chose the page that had California on it. To embellish the page I stenciled a field of stars with a blue ink pad and a Judikins field of stars stencil.
U.S. die cut Sizzix America card recycled book page Stefanie Girard Judikins field of stars stencil
I used the Sizzix United States die to cut out both the outline of America and the individual California state.
U.S. die cut Sizzix America card recycled book page Stefanie Girard Judikins field of stars stencil
Happy Election Year!

Tuesday, May 12, 2015

How to decorate food with die cut seaweed

I love to put little personal touches on everything-today a frozen pizza was my palette of choice and my medium was roasted seaweed. My tool was a heart and wing Sizzix die.
My inspiration came from the super cute and idea packed book Deliciously Decorative Cookies: 50 Stylish, Tasty Treats to Make and Decorate.
It features tutorials on how to make rice paper flowers and I thought about trying to decorate food with seaweed. To make the shapes I die cut hearts and winds with my Sizzix die cutter.
I cooked the pizza as directed and placed my die cut seaweed heart and wings right on the melted cheese. They settled right in and looked cute! I was thinking these seaweed embellishments would look cute on a bowl of hummus to bring to a party or on a bowl of macaroni and cheese?

 More about the book:
Deliciously Decorative Cookies: 50 Stylish, Tasty Treats to Make and Decorate
by
Fiona Pearce

This book features 50 projects, each showcasing at least one different technique; to assist readers to create beautiful cookie creations for all occasions. The projects are grouped according to the icing ingredient used to decorate the cookie, and include a key to indicate the skill level required to complete the project. This book includes simple but impressive designs, such as elegant cookies piped with royal icing, to the more complicated and unusual 3D cookie sculptures! There are also feature spreads that provide a handful of quick and easy cookies to make in moments, with the step-by-step guides making recipes easy to understand. The projects have been designed to suit readers of all skill levels and the beautiful photography of the finished cookies will serve as a design resource for experienced decorators.


Monday, December 19, 2011

How to re-make old shoes into glitter-tastic new ones

Shoes are most definitely my latest favorite thing to customize, alter and otherwise remake. I took my inspiration for this redo from the fabulous new book Sweat Shop Paris: Lessons from a Sewing Cafe.
This is what the shoes looked like before their transformation, plain dark brown but the folds offered a great way to divide up the space and use different colors.

How I altered the shoes:
I painted several coats of Plaid's Extreme Glitter paint onto the different sections of the shoes. I used red and black.
Then I die cut 4 pairs of scissors out of some silver Mylar making sure I did them in mirror images for the right and left shoes using the Cuttlebug scissor die. One set went on the toes and the other on the outside ankle area.
To glue the scissor on I used Tacky Glue and a toothpick.
Then all that was left to do was add a few coats of Crafty Chica Glossy Gloss Varnish to give them that glitter patten leather look and protect the scissors.

If you are a fan of the "redo" I bet you will live this beautiful and inspiring book!
More about the book from the publisher Andrews McMeel Universal:
Sweat Shop Paris: Lessons from a Sewing Cafe
by
Martena Dusss and Sissi Holleis

Sweat Shop Paris: Lessons from a Sewing Cafe brings the namesake Paris Sweat Shop founded by Martena Duss and Sissi Holleis to North America with more than 50 DIY fashion and home projects, including instructions and more than 200 helpful, inspiring full-color photographs. The first "cafe couture" sewing shop in Paris, the Sweat Shop was named to highlight the questionable nature in which store-bought clothing is sometimes made. Instead of rewarding dubious labor practices, the Sweat Shop and The Sweat Shop Book inspire crafters to make something unique with their own sweat equity and creativity.

Crafters meet at the cafe and share ideas while renting equipment by the hour. In addition, classes teach novices how to sew, knit, crochet, and much more.

In March 2010, Martena Duss and Sissi Holleis opened the Sweat Shop, the first sewing cafe in Paris, near the trendy boutiques of Canal St. Martin. Duss is a Swiss makeup artist. Holleis is from Austria, where she had her own fashion store and label. In addition to carving a niche in Parisian society, the Sweat Shop has been featured in publications such as Vogue, Elle, the New York Times, Le Monde, the Guardian, and Marie Claire.

Wednesday, August 17, 2011

How to make a framed cartoon greeting card with a Cricut Fancy Frame Die cut

Do you have a stash of little things cut from magazines and newspapers like I do? If you you do then why not use them to make greeting cards? The Cricut Fancy Frames Cartridge is the perfect cartridge to have in your craft arsenal to make all those recycled bits into framed art! (Want to win one? Pop on Over to Craft Gossip and leave a comment by August 25th, 2011 to get yourself in the running for a Cricut Fancy Frames Cartridge.)
Here is how I made my framed recycled cartoon greeting card:
I cut out one of the pretty frames from the Cricut Fancy Frames Cartridge.
To make the card I held the frame onto a piece of scrapbook cardstock and scored it.
Next I folded the cardstock in half on the scoreline and cut the card width. All that was left to do was trim the bottom flush to the top flap. I like cutting my cards after I make my top element as opposed to starting with a card and then embellishing it. I'm just crafty like that.
I felt the frame needed a little texture and color in the form of some Plaid paint and glitter to coordinate with the off-white of the cartoon paper and the blue glitter of my background cardstock.
Well, then I just went ahead and changed my mind and thought it ended up "blending" too much and I picked out another cardstock that contrasted a bit more.

If you can't read the cartoon it is one snowman telling another wearing a pair of way-long plaid pants, "They fit around the waist nicely, but you may want to hem them up a bit."

Tuesday, July 28, 2009

Locked & Loaded Jacket Patches made with The Cricut and the Blackletter font

Is it strange I am making a jacket when it's over 100 degrees out?

This is my first fabric project I made with my Cricut. I am soooooo hooked!

Here is how I did it:

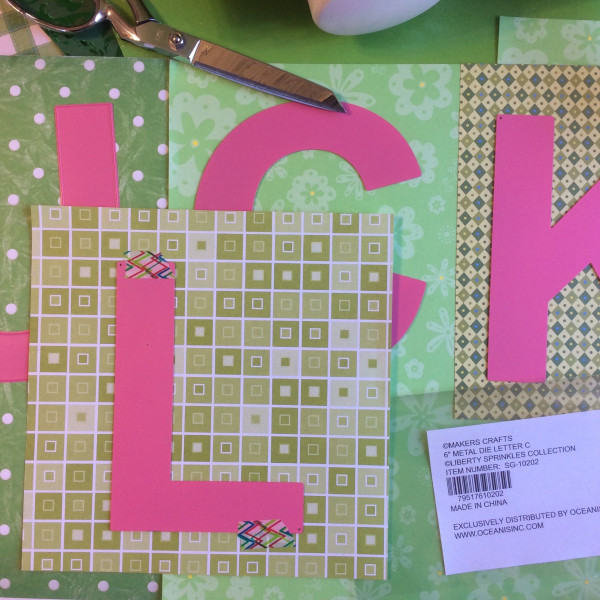
First I ironed Heat and Bond onto the back of a 12 x 12 piece of black cotton fabric (with tiny white dots just to be a bit cute)
Then I die cut the words Locked & Loaded using my Cricut die cutting machine using the Blackletter font.
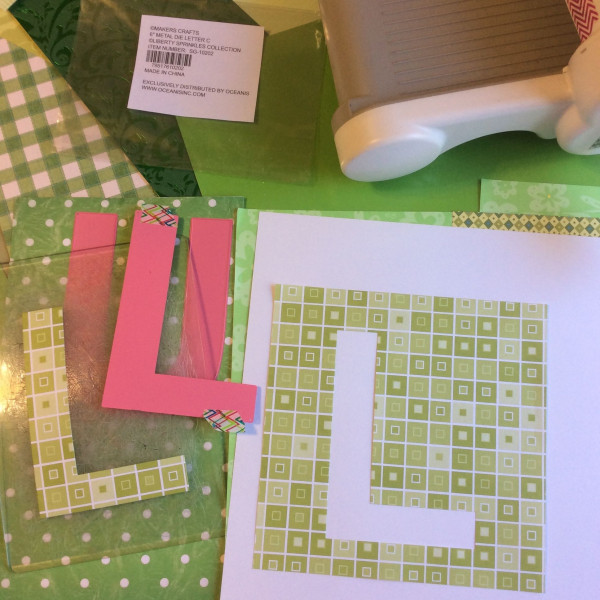
Then I repeated the process with a piece of white cotton to get the shadow effect for the ampersand (the "and" symbol).

Then I simply photographed a pair of scissors, uploaded it into my computer and printed it out to get my scissor image. I glued it right side down to the back side of the black fabric to cut it out.

Then to make the top and bottom rocker template off to Illustrator. (feel free to download the pattern)
I then glued the rocker patches onto the back of the white fabric and cut them out. Note: The scissors are there only to make sure there was enough space for them.

Then I pealed off the paper backing of the black scissors and ironed it onto the front of the white fabric. Then cut it out of the white fabric with about an eighth inch border.
I then pressed the letters onto the rocker sections and then aligned everything onto the back of my jacket and pressed it all down.

All that was left to do was some raw topstitching around the scissors and some clean stitching with black thread around the rocker patches about an eighth inch in from the outer edge.

Finally I added a stud to the center of the scissors at the hing point.

I think this is going to be like cross stitching is for me (my house is starting to look like a sign shop because I keep cross stitching all sorts of words and sayings) all my cloths are going to have something to say!

And speaking of signs, here is another one I made, snarky eh? Get it? If you want to see how I made this one (including a great way to align and space the letters super easy) pop on over to Craftside.


Bookmark and Share
Blog Widget by LinkWithin