Showing posts with label Cico Books. Show all posts

Friday, January 30, 2015

How to make a recycled plastic food container Valentine " XO" necklace

Making jewelry and playing with letters and type has got to be the ultimate culmination of getting to do two things at once for me. Today I made this fun "XO" (hug and kiss) Valentine's Day necklace out of a black plastic party to-go tray with inspiration from the book Upcycled Jewelry: Bags, Belts, and More.
recycled jewelrey, recycled plastic letters, how to. stefanie girard, valentine jewelry, xo

I die cut the X and O using a Sizzix die cutter out of the black plastic party tray.
recycled jewelrey, recycled plastic letters, how to. stefanie girard, valentine jewelry, xo

I went through my stash of jewelry chain and parts to find elements to put with my plastic letters.
recycled jewelrey, recycled plastic letters, how to. stefanie girard, valentine jewelry, xo


As it turned out a vintage clip earring worked great to use to link the X to the necklace! Totally random and cool.

If you like making recycled jewelry and working with materials in different ways I bet you will really like the book:

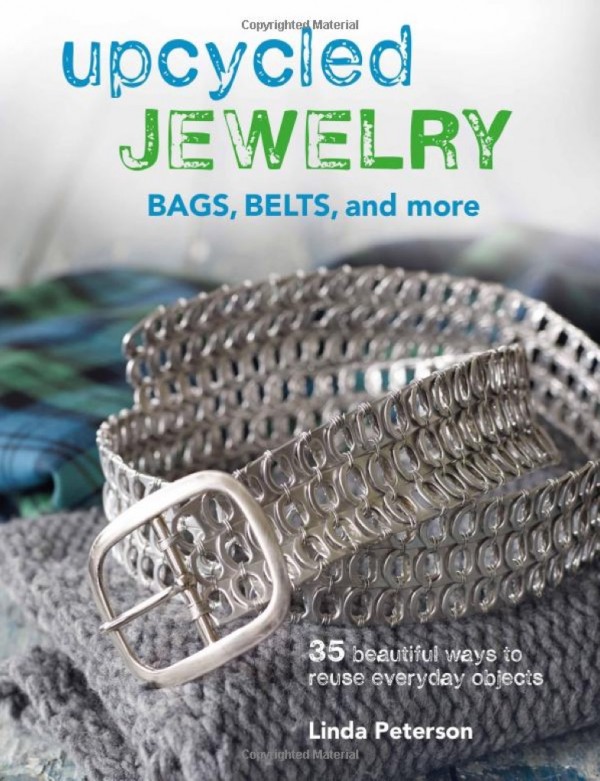
upcycled jewelry bags belts more

Upcycle to create 35 stunning pieces of jewellery and accessories. Discover how to take something that was destined for the rubbish bin and give it a new purpose, transforming it into something beautiful. Expert crafter Linda Peterson shows you 35 creative ways to upcycle ring pulls from drinks cans, zips, plastic, bike chains, tyre tubes and more. From a stylish ring pull belt to a pretty gold zip bracelet, and from stamped plastic earrings to a chunky bike chain bangle, there's plenty here to inspire you to get crafting. Every project has clear step-by-step photographs to guide you, and a basic techniques section covers all you'll need to know.


Wednesday, March 20, 2013

3 Necklaces made with a combo of new and vintage findings

Making jewelry with old parts and new parts is pretty much my favorite thing to do. Which is why I savored every page of Vintage Revised Jewelry: 35 step-by-step Projects Inspired by Lost, Found, and Recycled Treasures.


Here are 3 of my latest necklaces.

The one on the left is an old rhinestone necklace that was missing its focal center piece. I scored one of those new "vintage looking" skull cameos that happened to fit in perfectly. I love the combo!

The center is a vintage knot pin that I put the new letter beads on that spell out "nice" get it KNOT NICE ?

And the one on the right is one of those repro Tim Holtz game spinners just on a ball chain.

If you want to get yourself in the running for a copy of Vintage Revised Jewelry pop on over to Craft Gossip Recycling.

More about the Cico book:


Vintage Revised Jewelry:
35 step-by-step Projects Inspired by Lost, Found, and Recycled Treasures
by
Co-Co Nichole Bush

"Transform vintage finds and broken objects into jewellery to treasure with Vintage Revised Jewelry. Nichole Bush has a passion for creating one-of-a-kind jewellery by combining antique and vintage treasures to make distinctive and unique statements, and in these 35 projects, she shares that passion with you. Old keys become quirky earrings or hang on chains as a pretty necklace. Pieces of watches capture a moment in time - combined with other trinkets, they're turned into a lapel pin or wrist cuff. Anything can be a charm for a necklace or bracelet - from beads to brooches and earrings, even door knobs. Metal locker number tags act as intriguing focal points and tintypes (photographs on metal rather than paper, made in the late 19th century) provide an instant echo of the past. Some designs are deeply personal, incorporating things that remind Nichole of family and friends, and she suggests what you might include for your own individual pieces. With clear, step-by-step artworks and instructions, a helpful techniques section, and lots of inspiration throughout, you will soon become skilled in making your own pieces of nostalgic, stunning jewellery."

Thursday, March 7, 2013

Tiny crochet carrot Easter decorations

I love to crochet tiny little dimensional projects and that is what Teeny, Tiny Crochet: 35 Adorably Small Projects is all about. So suffice to say I am in heaven!
The first project I had to try was the crochet carrots, after all Rorschach Amineko already has his bunny ears and eggs.
 If you too love making tiny cute crochet things I bet you will love:

Teeny, Tiny Crochet: 35 Adorably Small Projects
by
 Catherine Hirst

More about the Cico book:

 "All good things come in small packages" is the thinking behind this new crochet book from expert crafts teacher, Catherine Hirst.

 Meet Ekaterina, Elena, and Eva three sisters who live in the highest onion dome of a very old building in St Petersburg, Russia although they are only two inches tall. They are best friends with the three bears Mama, Papa, and Baby Bear who love to snuggle up at night under their beautifully crocheted blankets. And although they don t know it, they share their house with the Catnip Mouse, who measures a teeny, tiny one inch from the tips of his whiskers to the end of his tail. Working with fine yarn and using the smallest of crochet hooks, here is an adorable collection of 35 projects, from miniature amigurumi-style animals to tiny accessories. Crafts teacher Catherine Hirst has created a menagerie of small-scale pets, a whole host of families, and beautiful accessories. There are crocheted cakes which really do look good enough to eat, plus pretty flowers which can be worn as brooches or hair decorations and cute decorations for the Christmas tree. You ll also learn how to crochet miniature beads so you can make your own jewelry. As well as 35 easy-to-follow patterns, there is a comprehensive basic techniques section which will help beginners to master the art of crochet. This book really does prove that all good things come in small packages!"


Wednesday, February 27, 2013

Ribbon and yarn make great curtain embellishments

This has got to be about the easiest decoration/embellishment ever! We can thank the super pretty book Tinkered Treasures: More than 35 easy-to-make projects to bring charm to the everyday for this inspiration.
 This ribbon embroidery hoop mobile was my inspiration to simply go off to the yarn stash and grab up a whole bunch of spring/Easter colored yarn in a variety of textures and simply cut lengths and wrap them around my curtain rod hooks. Then cut. Did I say easy?
Now I know my St. Patrick's Day towel is in the shot but there are only 2 weeks between St. Pattie's Day and Easter and that is just too little of time to have my house in bunny heaven. So we have the combo decorating going on. If you want to get yourself in the running for a copy of Tinkered Treasures pop on over to Craft Gossip Recycling.

More About the Cico book
Tinkered Treasures: More than 35 easy-to-make projects to bring charm to the everyday
 by
Elyse Major

"Tinkered Treasures is a how-to craft book that demonstrates how everyday mundane items can be transformed into charming and unique items. Elyse Major has created over 35 projects, using objects that can easily be found or that you might already have. She refers to these transformations as 'tinkering' as it perfectly describes her style of embellishing, repurposing and altering things without the need for any specialist tools and equipment or techniques. Tinkering is not about constructing - it's about appreciating the flaws but seeing the potential in little details. Each craft project in this book is designed for complete beginners - there are no particular skills involved. Measuring often gives way to estimating and many of the simple techniques are repeated from project to project. The book shows how to tinker all sorts of household and craft items to create a range of gorgeous gifts, treasures and trinkets, from clothespin dolls and tiny picture frames to favour baskets, bunting, fabric garlands, bookmarks and more. If you are new to crafting, have no fear because simple instructions along with a tools and techniques section are provided. All the projects in this book can be adapted to your own tastes - with a simple colour or pattern change you can create items to suit any style or home."


Tuesday, November 20, 2012

How to make a Thanksgiving place setting

This Thanksgiving place setting was inspired by my almost complete lack of fall colored home decor. I was flipping through the new book Super-cute Felt and the squirrel coaster just screamed cute (go figure!) and perfect for Thanksgiving. I have a "new" old vintage Formica table and I didn't want to cover it with a table cloth so placemats needed to be made. One of my only Thanksgiving decorations is my recycled wool felted sweater turkey you see in the background.

 
So first up I traced the super cute squirrel in the pattern section of Super-cute Felt. Cut out the pattern pieces and then cut 2 of each squirrel and 2 mirror images from a fuzzy felt.

Then I glued each pair together with Tacky Glue leaving the bottom area free of glue so I could put a weight in the bottom. I ended up using 2 floral marbles. For the acorns I cut one acorn body and 2 lids. I glued them together sandwiching the bottom between the lids.

To make the pumpkin placemats I grabbed a large piece of tracing paper and one of my plates to sketch out the size of the pumpkin so it would look nice with the size of my plates.

 After I sketched the pumpkin out on the paper I cut it out and then pinned the pattern to the felt.

After I cut out the pumpkin I used a Sharpie to draw in the inner lines and the parameter. I also added a green stem. Pretty darn easy and fast!

More about  Super-cute Felt from Cico Books:
 Super-cute Felt
by
 Laura Howard

"With 35 simple yet striking projects, Super-cute Felting is a must-have book for anyone with an appreciation of adorable, hand-crafted objects. Start with the 'Accessories' chapter, packed with pretty brooches, necklaces and scarves to keep you warm and snug - try the cute kitty purse that is sure to delight any little girl. 'Gifts' is next, with plenty of inspirational ideas, such as the fruity pincushion that any keen crafter will use again and again. In 'Homewares', you will find coasters, tea cosies and hot water bottle covers, all with a touch of vintage glamour. Finally, 'Celebrations' has unique decorating ideas for all the holidays, including Christmas, Halloween and Easter. There are projects for all skill levels, so you don't have to be an old hand in order to create something really special. Every design comes complete with clear step-by-step instructions and illustrations to guide you through each step. And at the back is a helpful techniques section explaining all the stitches and skills required, plus tips and tricks to make your creations really stand out."

Monday, April 2, 2012

Unusual Easter Egg decorations

I have been having some fun decorating eggs but not really the usual way or with the traditional themes. I was flipping through The Art of Papercutting and I came across this page that has a tutorial for decorating eggs with paper. Well, in keeping with my theme of unusual and recycling, I went to a copy of a fashion magazine to see what paper I could harvest.
I found a picture of a rather cranky lady and the word "guilty" and hey, in my mind they would make an awesome bit of egg decoupage.
After the dust settled...actually the Mod Podge dried I popped on my finger tip Hot Glue Gun Helper and flipped the switch on the Ad Tech cordless hot glue gun and secured a ribbon loop and a recycled Glass Glintz to each of my eggs.
As you can see I decoupaged one egg with a photo of scissors and stamped the word "head" on another....you get the joke right?
Egg Head??? Paper cutting???

Yah I know dorky!

If you like working with paper there are tons more great projects in:
The Art of Papercutting
by
Deborah Schneebeli-Morrell

More about the book from the publisher Cico Books:

"Papercutting has a long history, originally as a traditional folk art practised across Europe and North America, and now elevated to new, sophisticated levels. Here, Deborah Schneebeli-Morrell presents a stunning collection of 35 papercutting projects, ranging from party decorations, decoupage pictures and paper flowers, to greetings cards and gift tags. All have easy-to-follow instructions, with advice on the best paper to use for a superb result. Papers used in this book range from lightweight crepe paper and tissue to heavier weight card and water-colour paper. Recycling plays an important role, too - finding, collecting and using small scraps of discarded paper to incorporate into something new is a rewarding process. Here you will find wallpaper, postage stamps, gift wrap and postcards given a new lease of life. Whether you are new to the art of papercutting, or a skilled crafter looking for fresh ideas, the projects featured in the book will inspire you to pick up your scissors and a sheet of paper and create something beautiful."

Tuesday, March 27, 2012

How to applique a "Zzz" pillowcase

I love crafting "funny" and this is really funny. I also had so much fun posing Jane Doe Amineko for the shot just like in the book All Sewn Up that the tutorial is featured in.
I wasn't sure if I wanted to use a contrasting fabric like the directions in All Sewn Up specified or use some trim. After a little test driving I went with the black bias tape.
I pinned it on a pillowcase I had already made a while back so I simply took one of my smaller cutting mats and slipped it into the pillow so I could pin the ribbon in place without fear of pinning the front to the back.

A few laps through the sewing machine and I had a silly "Zzz" pillowcase!

If you like sewing adorable things I bet you will love:
All Sewn Up
by
Chloe Owens

More about the book from the publisher Cico Books:

"By replacing pens and pencils with needle and thread, and paint with fabric appliqué, Chloe Owens has applied artistic principles to sewing and created these unique projects showing her true passion for handcrafted things.

Packed full of 35 crafty ideas, Chloe uses a wide variety of techniques from embellishment and adornment to freehand embroidery that are forward thinking but still inspired by vintage style. Start by making something fun for a lunch with friends in Cooking Up A Storm. There are pretty placemats, table decorations, and even an apron for the hostess. In Cuddly Companions you will find a giraffe, lion, and bonkers bobtail bunnies to sew, each one decorated with pretty stitches. Gifts comes next, with tote bags and quilts that friends will love to receive. If you adore long lie-ins then Rest Your Weary Head has pillows with appliqué and embellishments, plus a Holly Golightly inspired eyemask. Finally, Room Decorations has wall murals and hangings to add a splash of color to your home. Every project comes with step-bystep instructions and adorable artworks, making everything so simple to stitch. There is also a handy

techniques section and templates to help you along the way. So what are you waiting for? Grab a needle and thread and get down to some seriously creative crafting."

Thursday, January 26, 2012

How to crochet a chain silver lame bracelet

I am a BIG fan of making something that is generally made out of one material out of something completely unconventional and unexpected and that is just the project that I fell in love with from the book Crocheted and Stitched Jewelry.

In Crocheted and Stitched Jewelry there is a crocheted chain necklace. I just had to make some crocheted chain! Off to the stash and I found some Lion Brand Silver Lame Metallic Yarn and I went with a size F hook.

I followed the basic stitch pattern and construction in Crocheted and Stitched Jewelry but I made a bracelet.

Confession: I actually brought this project to a meeting and I whipped this bracelet together in 2 hours!

I love it! I will most definitely be making more of these!

If you like making crocheted and stitched jewelry too then I bet you will love:
Handmade at Home: Crocheted and Stitched Jewelry
by
Emi Iwakiri

"Crocheted and Stitched Jewellery is part of a brand new series of craft titles from CICO. Beautifully packaged as a jacketed paperback and printed on woodfree paper, this series brings you a number of popular crafts at a very affordable price. Using traditional Japanese crochet techniques, Emi Iwakiri shows you how to create these adorable designs that include ribbons, beads, bows and even scraps from your sewing box. There are stunning ideas here to suit every occasion, from a classic cream silk pearl necklace to a vintage-style crocheted flower necklace. Try making a luxurious beaded collar to add a touch of glamour to any outfit, an elegant linen flower to wear in your hair or as a corsage or a fun, multi-coloured pompom bracelet for a modern, striking look. Whether you want to create original jewellery for yourself or to give as presents, you are sure to love Emi’s gorgeous Japanese designs. And once you have mastered her simple basic techniques, you will be able to create your own bespoke pieces in no time."

Thursday, January 19, 2012

How to make an origami Easter bunny paper garland

Yes, I know it's not even Valentine's Day yet but when I spotted the origami bunny tutorial in Wild and Wonderful Origami: 35 of Your Favorite Wild Animals to Fold in and Instant I just had to try it out right away! So I did. And then I did some more....and well let's just say I made origami bunnies like bunnies make bunnies!
I used some scrap pink, light blue and light green paper and got so good at these cuties I was walkin' around making them. I decided instead of drawing faces on these guys (the paper that comes with this book is pre-printed with the cute details) but since I made so many...well I thought I'd just draw but then I thought about using a tiny pom pom for the nose.

Well, when I started to play with the placement of the pom pom it looked more like the tail! So these little bunnies are bunnies from the back or front either way I think they are just too darn cute.

To turn them into a garland I threaded a piece of pastel thick thread onto a needle and stitched through each of the ears mixing up the colors of the bunnies.

If you too like to fold your fun then I bet you will love the Cico book:
Wild and Wonderful Origami: 35 of Your Favorite Wild Animals to Fold in and Instant
by
Mari Ono and Roshin Ono

"Make your own origami zoo with Mari and Roshin Ono's collection of amazing animals. Whether you love cute and cuddly animals like the baby bear and the cheeky monkeys, or are friends with the feathered variety, you are sure to go wild for any of the 35 innovative designs. There are four great chapters explaining how to really bring your paper to life. Animal Fun has classic designs like the crane and fox, while Safari takes its inspiration from the Serengeti with projects for zebras, giraffes, lions and more. Next is Sea World, home to ocean dwellers including the dolphin, sea turtle and even a blowfish, and the Forest chapter has ideas to transform your paper into a tree-dwelling owl or squirrel. Every project comes with simple step-by-step instructions and clear photographs, as well as helpful arrows showing you where to fold. Each design has also been given a skill rating, so start with a simple one and once you've mastered that move on to something a bit more challenging. 50 specially designed pieces of origami paper are included with the book, meaning you can start folding right away."

Thursday, January 12, 2012

How to make a recycled curtain flower fascinator

Light blue is one of my favorite colors and when I received a Whimsey box to find the most beautiful shade of light blue DecoArt SoSoft Fine Glitter Fabric Paint nestled in with all the other goodies I new that was what I needed to play with first. So off to the new book Handmade at Home: Button and Bead Jewelry for a bit of inspiration. This recycled curtain flower fascinator is what I came up with. I think it came out pretty darn purdy!
This pretty chiffon flower necklace featured in the book Handmade at Home was my inspiration. It just so happens to be in the same color as my DecoArt Glitter paint from the Whimsey box! All I needed was some flowers. Easy enough with an old curtain and my Sizzix die cutter.
I painted the fabric flowers rather sparsely and rather haphazardly to give them a dimensional look.
To make then actually dimensional I stitched them together as you can see starting from the back and ending on the front ready for the next layer.

When I had all the flower layers together I stitched the bead onto the top center and secured the bead and layers together with an additional stitch. All that was left to do was a few stitches to the headband.

If making pretty jewelry from buttons, beads and fabric is your style then I bet you will love:
Button and Bead Jewelry: 25 Step-By-Step Projects
by
Deborah Schneebell-Morrell

More about the book from the publisher Cico Books:

"Bring to life the undiscovered treasures of your sewing box. Handmade at Home: Button and Bead Jewelry is an essential guide to creating stunning, fashionable jewelry. Craft author Deborah Schneebeli-Morrell shows you how by using a wide variety of materials, from chiffon and lace to copper and moonstone, as well as scraps from past projects, you can make any number of contemporary, eye-catching pieces, each with your own unique twist. Whatever your standard, the 25 delightful projects and variations - from a ribbon choker with velvet flowers to linen heart brooches - will help you make the most of your sewing box. Whether you want to make practical, fun, everyday items or intricate, stylish designs, there is a range of projects to suit your tastes. Complete with step-by-step photographs, helpful explanations of techniques and a comprehensive list of materials, Button and Bead Jewelry will help you on your way to creating exquisite pieces in no time."
Blog Widget by LinkWithin