Showing posts with label Easter. Show all posts

Wednesday, March 6, 2019

How to make HOP TO IT Easter lettering sign with die cut letters

die cut letter sign Easter, die cut letters, Liberty Sprinkles, Stefanie Girard, Hop to it
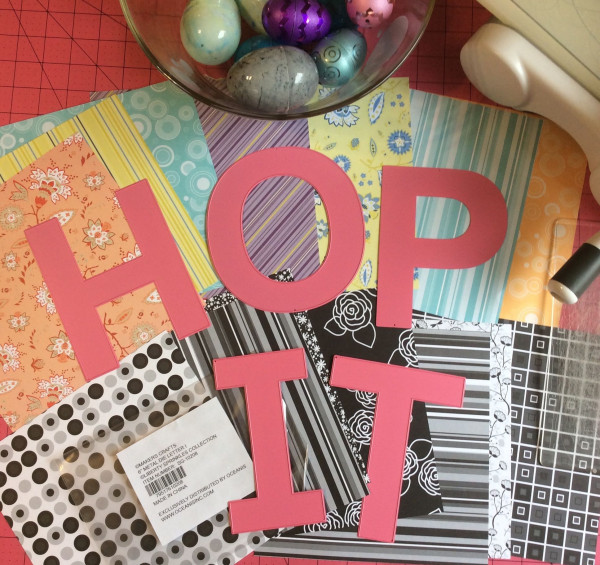
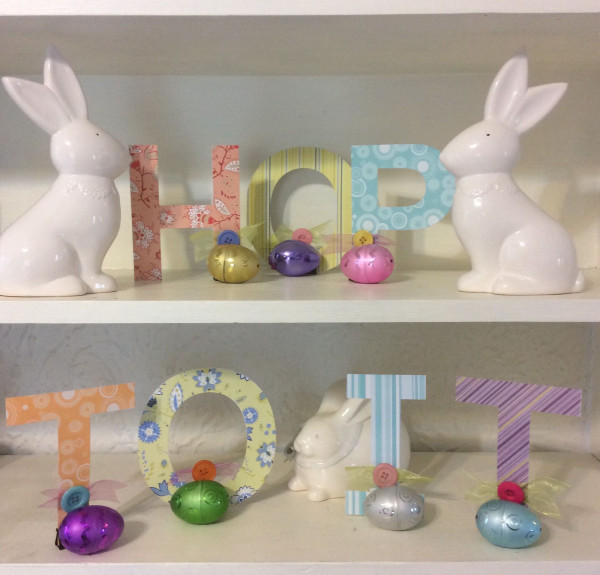
Today is the first day of lent so that means I can officially start crafting for Easter and I whipped up this HOP TO IT sign with 6 inch letter dies, a bit of scrapbook paper, and of all things binder clips!
die cut letter sign Easter, die cut letters, Liberty Sprinkles, Stefanie Girard, Hop to it
I picked out a variety of colors of scrapbook paper with different prints and then die cut them taking care to place the dies on the squares slightly off center as I will use the outside die cuts in future projects- you know how I love twofers!
die cut letter sign Easter, die cut letters, Liberty Sprinkles, Stefanie Girard, Hop to it
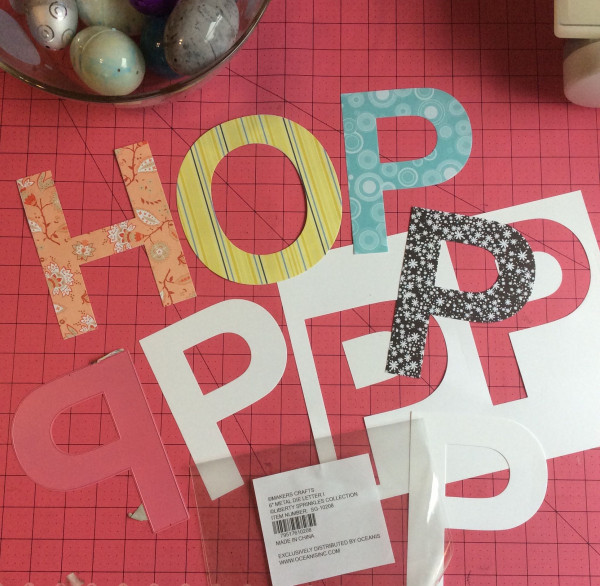
I also cut a set of these letters out in black and white print paper. The only letter that doesn't flip is the "P" so I had to make 2 letter P's. All the other letters when flipped are in the right direction.
I glued all the letters back to back and this made them stand up.
die cut letter sign Easter, die cut letters, Liberty Sprinkles, Stefanie Girard, Hop to it
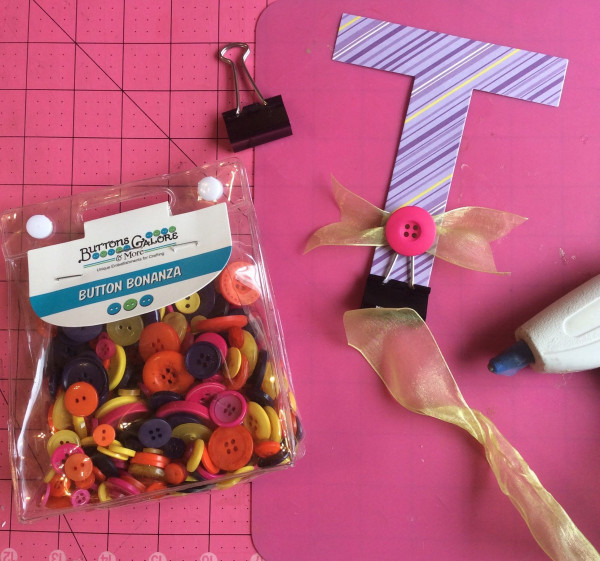
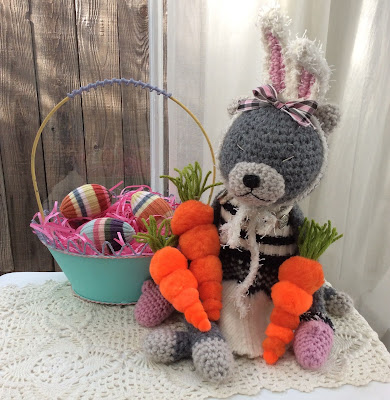
For the stands I used binder clips embellished with organza ribbon and buttons. I arranged the letters on the shelf with pretty Easter eggs in front of the clips and a few bunnies.
Since "HOP TO IT" works as an inspirational quote I will flip the letters over and use the black and white side after Easter. I promise to share it so be sure to subscribe to our email and you won't miss it.

Tuesday, March 22, 2016

How to make pom pom carrot Easter decorations

No matter what new materials come out I still seem to think of ideas to make with pm poms. Today's fun little pom pom creations are carrots that my amineko thinks are just too fun not to snuggle, I know she doesn't look happy but she is :)
pom pom carrots Easter Amineko, how to craft stefanie girard
All that you need for these little creations are a variety of sizes of orange pom poms, a bit of green yarn and a hot glue gun.  Simply glue the pom poms together from smallest to largest.
pom pom carrots Easter Amineko, how to craft stefanie girard
To make the carrot top I looped a few wraps of yarn around 3 fingers and tied a knot around them with another piece of yarn. Then I tied a piece of yarn around all the loops. Then I cut the loops open and glued the tied end into the large pom. I made a bunch because quite frankly they were so easy and cute.

Friday, March 18, 2016

How to make washi tape bunny ears planner clips

It's that time of year when everything should have bunny ears on it. In my world it's all the time but I know some people only bunny embellish around Easter. Want to dress up your planner pages with some bunny ears that are so easy to make with a bit of pink washi tape and a few paper clips? Read on.
planner clip washi tape bunny ears paper clip stefanie girard bookmarks
Fold a strip of washi tape through the small bend in the paper clip and adhere the tape back on itself.
Where the tape is around the paper clip it can gather up a bit.
planner clip washi tape bunny ears paper clip stefanie girard bookmarks
Trim the washi tape into a bunny ear shape. Repeat for the second ear. I made a bunch for my planner and for my travel journal.
planner clip washi tape bunny ears paper clip stefanie girard bookmarks
 I bet these would also make cute bookmarks to include in tiny Easter baskets.

Happy Easter everyone!

Monday, March 14, 2016

How to make a die cut Easter Bunny pedestal

Easter bunny pedestal, Sizzix die cut, Phoomph, stefanie girard
In my humble opinion you can never have too many bunnies. With Sizzix bunny die and Big Shot Die Cutter I can make as many as I want! I thought I combine the bunny die with their pink paper leather and some Phoomph to create a bunny pedestal for Easter.
Easter bunny pedestal, Sizzix die cut, Phoomph, stefanie girard
This project is super easy.
Simply peal off the paper backing from the Phoomph and apply the pink paper leather to each side.
Then die cut 4 bunnies.
Easter bunny pedestal, Sizzix die cut, Phoomph, stefanie girard
Hot glue two bunnies together nose to nose taking care to make sure the bottom edge of the bunnies are aligned.

Then glue the other two to the first pair on each side.

For a final touch I trimmed the tail off and replaced it with a little white pom pom.

Then I went to my little plate collection and found one that looked nice sitting on top of the four bunny's ears.

This little bunny pedestal decoration is perfect to feature a few of my Easter eggs.

Thursday, March 3, 2016

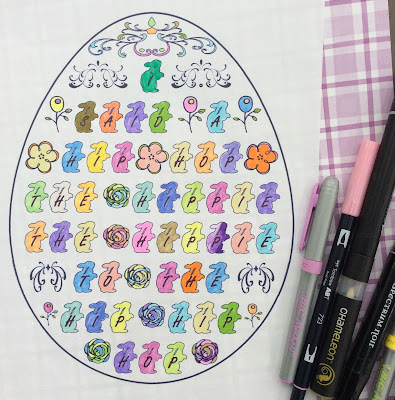
Hip Hop Easter Egg adult coloring page

I love designing quick little adult coloring pages for each holiday. Today's is an Easter page that features bunnies on an egg with the quote, "I said a hip hop the hippie the hippie to the hip hip hop" which just makes me giggle :)
free Adult coloring page, easter coloring, stefanie girard ,bunny
The bunnies were fun to color in a variety of pretty Easter colors with a variety of BIC markersChameleon Markers, Spectrum Noir and Tombow Markers.

Feel free to download and if you do, leave a comment with a link to your finished page or tag me on Instagram @StefanieLGirard
free Adult coloring page, easter coloring, stefanie girard ,bunny


Tuesday, March 31, 2015

How to make illuminated Easter eggs

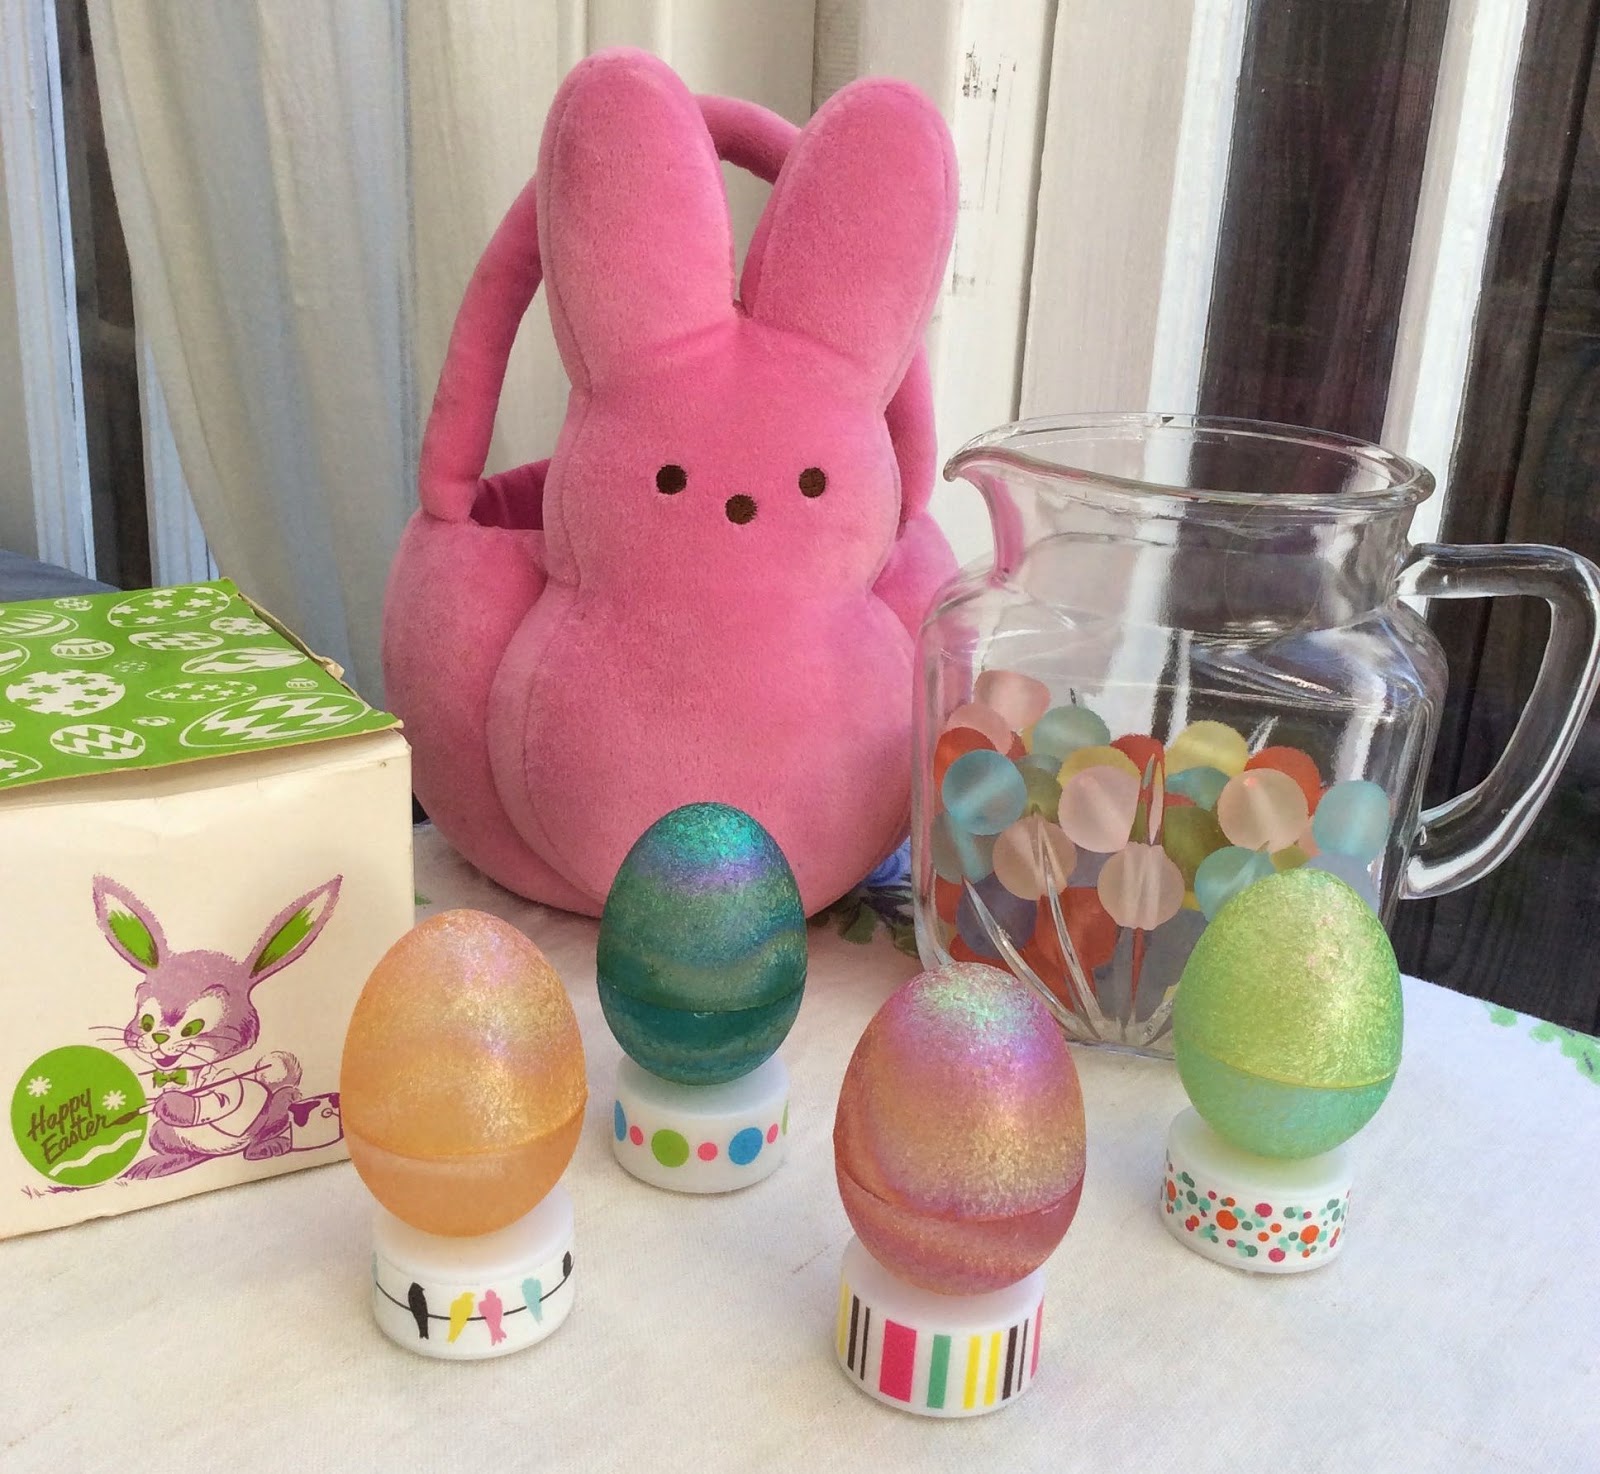
I'm kind of in love with those little battery operated tea lights. I used them to make illuminated large crystal Easter eggs featured over at Craftside. I made this set with smaller plaster Easter eggs that have a glitter surface.
light up easter eggs
I decorated the base of the tea light with a strip of washi tape.
light up easter eggs, washi tape embellished battery lights, tea lights
 I tried several different ways to drill the hole in the bottom of the plastic egg. I cracked a few. The best way I found was to use a cone shaped sanding bit on my Dremel.
how to drill hole in plastic egg with Dremel stefanie girard
I used a bit of hot glue to attache the eggs to the tea lights so they would stand straight up.

Thursday, March 5, 2015

How to make a bunny bookmark with an Annie's Macaroni and cheese box

This is just a cute and simple fun way to make a recycled bunny bookmark with the tab from the box of Annie's Macaroni and cheese. These could be a cute Easter project to use in a bunny story book.
Simply cut the side tab out along the corners of the box. Then very carefully with an x-acto knife cut the perforated lines on the box. Yup, that simple. And as you can see the little bunny ears stick out above the top edge of the book and look so cute!
 I will be making some projects from this super cute The Paper Hat Book: Super Hats for Super Kids book that include a lot of recycled materials like food boxes and pother pretty packaging.


Hats are pure fun and the perfect item to cap off any costume or ensemble. The right headgear ensures complete transformation, especially on the head of an imaginative child.

The Paper Hat Book offers creative families 20 fantastic paper hats, all of which can be created quickly and easily from readily accessible papers: shopping bags, newspapers, comics, recycled story books, magazines, packaging scraps, and junk mail!

Artist and designer Alyn Carlson creates hats that are perfect for birthday parties, playdates, costumes, and everyday dress up. Each hat can be styled to perfectly suit the wearer by merely selecting the right paper and colors. The hat themes range from Floral Flappers to Viking Warriors, and from superheroes and pirates to beautiful butterfly hats.

Alyn Carlson is an artist, designer, stylist and part time chicken rancher living in a converted church who believes in setting the table for the muse. Always in search of the line, font, pattern, seed, flavor, musical note to be placed at the right time in the right place. As a paper artist, her extraordinary hats, suitable for children and adults for a garden party, whimsical wedding, a paper-lover's birthday party or just-because, have been featured in countless blogs and in the current issue of Uppercase Magazine. Alyn is also featured in the best selling Design Sponge book.

Thursday, March 28, 2013

How to make a pom pom Easter Bunny holding a carrot

Did you know you can sculpt pom poms? Well you can. I think pom poms have to be in my top 10 craft materials to cut up! Today, just in time for Easter, I have a cute pom pom bunny inspired by the ultra adorable book Adventures in Pompom Land: 25 Cute Projects Made from Handmade Pompoms.
 Here is how I made my pom pom bunny:
I gathered up a bunch of pre-made pom poms as I have a huge stash. I know the handmade one's are great but I was in the mood to make a bunny quick!

Also needed was a tiny bit of white felt, a pink marker, scissors and hot glue gun.

You can see the sizes I started with in the photo.
I hot glued the large and medium together then trimmed them to be more of an "egg shape".

I trimmed the other large pom pom down to an egg shape (or bunny head shape) as well then glued it onto the body.

Next the hands, feet and tail were attached.

I cut out the ear shapes, colored them with a bit of pink marker and then glued them into the head pom pom.

To make the pom pom carrot I  trimmed the orange pom pom down...a lot! and then glued a tiny green pom pom on top.

The eyes and nose were glued on and the carrot between the paws.

And if you are like me and like to make things out of pom poms you will love this cute book!

More about the book from Lark Crafts:
  Adventures in Pompom Land: 25 Cute Projects Made from Handmade Pompoms
by
 Myko Diann Bocek

"Enter the wonderful land of pompoms, where cute critters and creative adventures await you. All the projects in this unique collection begin with handmade, not pre-purchased, pompoms, and every step is beautifully laid out with easy-to-follow instructions and plenty of images. Crafters can then create 25 charming creatures—from a sweet little bluebird to a lop-eared bunny—out of wool yarn, roving, and felt. It's fun to do and every project is off-the-charts adorable!"

Thursday, March 7, 2013

Tiny crochet carrot Easter decorations

I love to crochet tiny little dimensional projects and that is what Teeny, Tiny Crochet: 35 Adorably Small Projects is all about. So suffice to say I am in heaven!
The first project I had to try was the crochet carrots, after all Rorschach Amineko already has his bunny ears and eggs.
 If you too love making tiny cute crochet things I bet you will love:

Teeny, Tiny Crochet: 35 Adorably Small Projects
by
 Catherine Hirst

More about the Cico book:

 "All good things come in small packages" is the thinking behind this new crochet book from expert crafts teacher, Catherine Hirst.

 Meet Ekaterina, Elena, and Eva three sisters who live in the highest onion dome of a very old building in St Petersburg, Russia although they are only two inches tall. They are best friends with the three bears Mama, Papa, and Baby Bear who love to snuggle up at night under their beautifully crocheted blankets. And although they don t know it, they share their house with the Catnip Mouse, who measures a teeny, tiny one inch from the tips of his whiskers to the end of his tail. Working with fine yarn and using the smallest of crochet hooks, here is an adorable collection of 35 projects, from miniature amigurumi-style animals to tiny accessories. Crafts teacher Catherine Hirst has created a menagerie of small-scale pets, a whole host of families, and beautiful accessories. There are crocheted cakes which really do look good enough to eat, plus pretty flowers which can be worn as brooches or hair decorations and cute decorations for the Christmas tree. You ll also learn how to crochet miniature beads so you can make your own jewelry. As well as 35 easy-to-follow patterns, there is a comprehensive basic techniques section which will help beginners to master the art of crochet. This book really does prove that all good things come in small packages!"


Wednesday, February 27, 2013

Ribbon and yarn make great curtain embellishments

This has got to be about the easiest decoration/embellishment ever! We can thank the super pretty book Tinkered Treasures: More than 35 easy-to-make projects to bring charm to the everyday for this inspiration.
 This ribbon embroidery hoop mobile was my inspiration to simply go off to the yarn stash and grab up a whole bunch of spring/Easter colored yarn in a variety of textures and simply cut lengths and wrap them around my curtain rod hooks. Then cut. Did I say easy?
Now I know my St. Patrick's Day towel is in the shot but there are only 2 weeks between St. Pattie's Day and Easter and that is just too little of time to have my house in bunny heaven. So we have the combo decorating going on. If you want to get yourself in the running for a copy of Tinkered Treasures pop on over to Craft Gossip Recycling.

More About the Cico book
Tinkered Treasures: More than 35 easy-to-make projects to bring charm to the everyday
 by
Elyse Major

"Tinkered Treasures is a how-to craft book that demonstrates how everyday mundane items can be transformed into charming and unique items. Elyse Major has created over 35 projects, using objects that can easily be found or that you might already have. She refers to these transformations as 'tinkering' as it perfectly describes her style of embellishing, repurposing and altering things without the need for any specialist tools and equipment or techniques. Tinkering is not about constructing - it's about appreciating the flaws but seeing the potential in little details. Each craft project in this book is designed for complete beginners - there are no particular skills involved. Measuring often gives way to estimating and many of the simple techniques are repeated from project to project. The book shows how to tinker all sorts of household and craft items to create a range of gorgeous gifts, treasures and trinkets, from clothespin dolls and tiny picture frames to favour baskets, bunting, fabric garlands, bookmarks and more. If you are new to crafting, have no fear because simple instructions along with a tools and techniques section are provided. All the projects in this book can be adapted to your own tastes - with a simple colour or pattern change you can create items to suit any style or home."


Monday, April 23, 2012

Easter turtles

As far as I'm concerned everything is better with bunny ears on it. And add a bit of irony to the mix and you get downright hysterical in my book!

Craftside-A behind-the-scenes peek at our crafty world
This week at Craftside there are tutorials on how to paint vintage style dahlias, 2 ways to create collages and make a recycled soda bottle bird feeder along with a recipe for atomic tofu pecan loaf. 
RockPaperInk.comFashion Filter: The Fetish: Fashion's Guilty Pleasure
Aileen's Musings
Aileen shows us step-by-step how she created faux copper patinaed paper flowers.
Crafty Princess Diaries
Tammy reviews an interesting new e-book on Fair Isle knitting that has some very cool embedded videos.
Eileen - The Artful Crafter
Learn how to create cute clay pot garden bells for your yard!
Mixed Media Artist
Got a few paint-soaked paper towels lying around? Don't you dare throw them out!
Stefanie Girard's Sweater Surgery
See how to sew a scissor holster garter.

Saturday, April 7, 2012

The Easter egg chain link fence decoration

I have been having so much fun decorating my ugly chain link fence for each holiday. Here is the Easter egg version. Happy Easter all ya'll!

Eileen - The Artful Crafter
Don't throw those Easter egg shells away. Here's how to make an egg shell mosaic box using them.
Mixed Media Artist
Never throw ANYthing out, not even paint-soaked paper towels!
Craftside-A behind-the-scenes peek at our crafty world
This week at Craftside there are tutorials on portrait poses, how to make frosting bunnies, chicks and eggs, along with info on house rabbis and a recipe for white bean dip with rosemary oil.
Carmi's Art/Life World
Carmi explains how her puppy became the Easter Bunny for a set of greeting cards.
Aileen's Musings
Aileen shows you the bowties she made with her DIL and gives you a few links to easy tutorials for making your own for the young man in your life.
Crafty Princess Diaries
The Crafty Princess explains how to make a simple art book.

Monday, April 2, 2012

Unusual Easter Egg decorations

I have been having some fun decorating eggs but not really the usual way or with the traditional themes. I was flipping through The Art of Papercutting and I came across this page that has a tutorial for decorating eggs with paper. Well, in keeping with my theme of unusual and recycling, I went to a copy of a fashion magazine to see what paper I could harvest.
I found a picture of a rather cranky lady and the word "guilty" and hey, in my mind they would make an awesome bit of egg decoupage.
After the dust settled...actually the Mod Podge dried I popped on my finger tip Hot Glue Gun Helper and flipped the switch on the Ad Tech cordless hot glue gun and secured a ribbon loop and a recycled Glass Glintz to each of my eggs.
As you can see I decoupaged one egg with a photo of scissors and stamped the word "head" on another....you get the joke right?
Egg Head??? Paper cutting???

Yah I know dorky!

If you like working with paper there are tons more great projects in:
The Art of Papercutting
by
Deborah Schneebeli-Morrell

More about the book from the publisher Cico Books:

"Papercutting has a long history, originally as a traditional folk art practised across Europe and North America, and now elevated to new, sophisticated levels. Here, Deborah Schneebeli-Morrell presents a stunning collection of 35 papercutting projects, ranging from party decorations, decoupage pictures and paper flowers, to greetings cards and gift tags. All have easy-to-follow instructions, with advice on the best paper to use for a superb result. Papers used in this book range from lightweight crepe paper and tissue to heavier weight card and water-colour paper. Recycling plays an important role, too - finding, collecting and using small scraps of discarded paper to incorporate into something new is a rewarding process. Here you will find wallpaper, postage stamps, gift wrap and postcards given a new lease of life. Whether you are new to the art of papercutting, or a skilled crafter looking for fresh ideas, the projects featured in the book will inspire you to pick up your scissors and a sheet of paper and create something beautiful."

Sunday, April 1, 2012

It's beginning to look a lot like...Easter!

No, this trifecta of cuteness is not mine, they belong to a good friend of mine who let me get my "bunny lovin' fix". They were so soft and silly.

I hope you have crafted up something this springtime that is making you smile. If not here are some ideas that might help:

Craftside-A behind-the-scenes peek at our crafty world
This week at Craftside there are tutorials on how to make an Easter egg pop art decoration, a recycled leather Steampunk style cuff, embroider multicolored yarn "X" shapes on your knitting and a recipe for bacon butter.

RockPaperInk.com

Off Book/Typography/PBS Arts video


Mixed Media Artist
Even though she has very few drawing skills, Cyndi is pleased with the results of her latest quilt experiment.

Stefanie Girard's Sweater Surgery
How to applique a "Zzz" pillowcase.

Eileen - The Artful Crafter
You can make any size envelope with the Crafter’s Companion Ultimate crafting tool. Look at how easy it is to “push the envelope”

Crafty Princess Diaries
The Crafty Princess takes a road trip and visits an amazing yarn shop in Florida.

Carmi's Art/Life World
The spring ring. So easy to make and wear!

Aileen's Musings
Aileen shows you how she turned trash to treasure with a re-purposed whisk, ribbon spool, felt and a little ingenuity.

Tuesday, February 28, 2012

How to make a recycled wool sweater Peep garland

Peep-tastic!
Generally when you think of wool sweaters you think of winter and Christmas crafts well not me. I was flipping through Felt Me a Smile: Heart-made Projects to Make and Give and boy was I smiling with page after page of pure cuteness! Specifically this bunny just called to me and reminded me that Easter is just around the corner.
One of my all time favorite bunnies is the bunny Peep and I thought that was just the bunny to make.
I found an outline online (that was fun to type :) of the Peep. I simply pinned the pattern to a bit of yellow recycled wool felted sweater and cut it out, and then cut more out, until I had all the Peeps I could make from my sweater scrap!
To make the eyes and nose I used a bit of black Tulip dimensional paint.

After the cute little faces were dry I ran a bit of thread through the bunny Peep ears. The recycled wool felted sweater is thick enough to hold the thread.

If you too like to make cute little felted things then I bet you will love:
Felt Me a Smile: Heart-made Projects to Make and Give
by
Toyoko Sugiwaka

More about the book from the publisher Potter Craft:

" Cute, quirky, huggable, & lovable animal-inspired projects for crafters of every skill level!

These 16 simple, useful, and wonderfully whimsical animal-inspired projects are guaranteed to elicit smiles all around. They use felting, embroidery, crochet, and fabric-painting techniques and are suitable for crafters of all levels and interests thanks to the step-by-step photographs, templates, and stitch-by-stitch instructions. Fans of today's popular Japanese crafts as well as animal-lovers everywhere, will find these ideas totally irresistible—from the twinkle-toed poodle baby booties to the adorable pair of hugging bears."

Thursday, January 19, 2012

How to make an origami Easter bunny paper garland

Yes, I know it's not even Valentine's Day yet but when I spotted the origami bunny tutorial in Wild and Wonderful Origami: 35 of Your Favorite Wild Animals to Fold in and Instant I just had to try it out right away! So I did. And then I did some more....and well let's just say I made origami bunnies like bunnies make bunnies!
I used some scrap pink, light blue and light green paper and got so good at these cuties I was walkin' around making them. I decided instead of drawing faces on these guys (the paper that comes with this book is pre-printed with the cute details) but since I made so many...well I thought I'd just draw but then I thought about using a tiny pom pom for the nose.

Well, when I started to play with the placement of the pom pom it looked more like the tail! So these little bunnies are bunnies from the back or front either way I think they are just too darn cute.

To turn them into a garland I threaded a piece of pastel thick thread onto a needle and stitched through each of the ears mixing up the colors of the bunnies.

If you too like to fold your fun then I bet you will love the Cico book:
Wild and Wonderful Origami: 35 of Your Favorite Wild Animals to Fold in and Instant
by
Mari Ono and Roshin Ono

"Make your own origami zoo with Mari and Roshin Ono's collection of amazing animals. Whether you love cute and cuddly animals like the baby bear and the cheeky monkeys, or are friends with the feathered variety, you are sure to go wild for any of the 35 innovative designs. There are four great chapters explaining how to really bring your paper to life. Animal Fun has classic designs like the crane and fox, while Safari takes its inspiration from the Serengeti with projects for zebras, giraffes, lions and more. Next is Sea World, home to ocean dwellers including the dolphin, sea turtle and even a blowfish, and the Forest chapter has ideas to transform your paper into a tree-dwelling owl or squirrel. Every project comes with simple step-by-step instructions and clear photographs, as well as helpful arrows showing you where to fold. Each design has also been given a skill rating, so start with a simple one and once you've mastered that move on to something a bit more challenging. 50 specially designed pieces of origami paper are included with the book, meaning you can start folding right away."

Monday, April 25, 2011

Stefanie and the Bunny Peep drink

I hope your Easter was fabulous!
It's Monday in in my post Easter glow I bring you some links to craftasticly good projects.

Craftside-A behind-the-scenes peek at a crafty world
This week at Craftside there are tutorials on how to paint a hatching chick, make a recycled book page egg ornament, and a tilt-shift photography effect along with bunny and squirrel clip art.

Carmi's Art/Life World
A little sachet tutorial for Easter or Mother's day projects.

Aileen's Musings
Aileen shares a free printable cupcake for you to download and use in your art!

Crafty Princess Diaries
Tammy is dreaming about her chance to craft and write over her summer break.

Eileen - The Artful Crafter
Celebrate spring by making a pressed flower card.

Mixed Media Artist
Cyndi has been sharing a travelog of her most recent trip to Guatemala!

Stefanie Girard's Sweater Surgery
Learn how to make a "black sheep" necklace.

Tuesday, April 5, 2011

How to crochet an Easter Egg

Got some scraps of yarn lurking around and in the mood to whip up a few Easter Eggs for decoration? They are super easy and quick! I was inspired to crochet these eggs after reading the new book Little Crochet: Modern Designs for Babies and Toddlers. I don't have babies or toddlers but I do have Aminekos and they just loved their eggs. If you like Roy's Easter Bunny ears and want to make a pair hop on over the Crocheted Easter Bunny Ears Pattern at Craftside.

This was the page that really inspired me. I loved the concentric circles in pretty colors on this blanket from Little Crochet and they reminded me of the stripes on Easter eggs and I thought how easy it would be to make some.
Here is the rough pattern on how to crochet Easter Eggs as it is quite flexible:

Yarn scraps
Hook to match yarn size.
marbles
stuffing
yarn needle

I pretty much used worsted weight yarn but some of my yarns were smaller so I double stranded.

Chain 3
7-8 single crochets into the first chain stitch
join with slip stitch
Single crochet around increasing about every other stitch until you get to about 15-17 stitches
At this point I started to change colors and make stripes.

Sometimes I did one round and then switched colors other times two rounds. If I planned to use the color again I left the yarn on and just picked it back up when I wanted to use it again. This saved a bit of end knotting etc.

After I did about 6 rows of stripes with no increases I started to decrease about every 3rd or 4th stitch to make the pointier end of the egg.

I should also note after the row of my last color change I trimmed the ends and knotted while the opening was wide.

After a few rounds with decreases I added 3 marbles and some stuffing.

Then when there was only about 3-4 stitches left I cut the yarn and stitched the egg closed.

Pretty easy, hu? Well, if you like crocheting little cute things you will love this book filled with these types of projects!
Little Crochet
Modern Designs for Babies and Toddlers

By
Linda Permann

More about the book from Potter Craft:

Linda Permann, author of Crochet Adorned, brings modern colors and fun-to-work stitch patterns to the pint-sized crowd with this cute collection of over 24 clever crochet patterns for kids.

The adorable designs in Little Crochet are worked in a range of washable fibers and vibrant hues that babies and toddlers are sure to love. Make tiny sweaters, dresses, pants, and accessories while exploring a range of construction techniques, including top-down cardigans, side-to-side sweater vests, motif-based yokes, and traditional seaming. Beautiful blankets, sweaters, soft toys, bibs, booties, and hats employ simple stitches that are sure to steal the show at baby showers. Whether you have a couple of hours or a couple of weeks till the baby's due date—you'll find the perfect project in this book.

And here's the best part: Little Crochet includes size ranging from 0–4+ years, so you can keep crocheting as the little ones in your life grow. Plus, Linda has included lots of wearable patterns for both boys and girls, with swatches showing alternate colorways sprinkled throughout. Each pattern is designed to spark your own creativity, complete with how-to instructions for adding your own crafty touches like sewing, embroidery, and appliqué. Work confidently from Linda's easy-to-follow instructions, clear stitch diagrams ,and schematics, and her illustrated guide to basic and advanced stitches and finishing techniques.

Whether you’re new to crochet or experienced with a hook, you'll find these little designs a joy to stitch and share.

LINDA PERMANN is the author of Crochet Adorned and has published over 50 crochet designs in magazines including Crochet Today, Interweave Crochet, CRAFT, Knit Simple, and Living Crafts. She designs and teaches crochet in San Antonio, Texas. When she's not crocheting, she also enjoys sewing, knitting, gardening and playing with her adorable nephew. Read more about her crafty adventures at www.lindamade.com.
Tuesday, March 16, 2010

How to make recycled plastic bunny ears inspired by the techniques in the book Upcycled Accessories

Upcycled Accessories: 25 Projects Using Repurposed Plastic
is packed full of really cool techniques fro working with plastic bags to recycle them into all sorts of cute and colorful projects.
It got my wheels spinning it did!

I wondered if you could fuse a plastic bag to a milk jug. At about the same time I was debating putting Orval and Wilbur (my lawn deer) away or could I incorporate them into the Easter decorations.
Insert light bulb moment here.
If I make bunny ears they can stay out and if I make them out of plastic they are whether proof! Clearly by the photos it worked!


Here is my test with a scrap of milk jug and pink plastic bag.

I cut the ears out of the milk jug using the corners and curves of the bottle. I will say I had to be VERY careful with the heat. Too cool it didn't fuse and too hot for too long and melt too much. As they are cooling you can form them a bit or hold them (with gloves) in the shape you want while it cools.
These are just some more shots because I think they came out so cute!
Want to learn about recycled plastic bag fusing and projects, grab a copy of

Upcycled Accessories: 25 Projects Using Repurposed Plastic
By
Tracie Lampe

From the Publisher, North Light Books:
"Product Description
Fused and Re-used

Whether you?re a sewing enthusiast or an eco-superhero, Upcycled Accessories shows you how to upcycle disposable products into fashionable must-haves! Learn the basics of fusing plastic, then sew together colorful wallets, personalized journals and collaged tote bags. Finally, incorporate creative embellishing techniques to whip up one-of-a-kind plastic projects!

Upcycled Accessories features:

25 funky fused-plastic projects for all experience levels that use inexpensive, readily available materials

Embellishing techniques for incorporating crayon shavings, permanent markers, fabric appliqu? and much more

Tips for incorporating more than just left-over shopping bags?everything from food packages to tablecloths can be upcycled!
Fuse. Sew. Help save the planet!

About the Author
Tracie Lampe is a self-taught mixed-media artist and fiber artist/vendor. Her work has been featured in Artist Trading Card Workshop as well as Interactive Art Workshop. Tracie has been teaching at ArtFiberFest for four years and sells her handspun fibers."
Blog Widget by LinkWithin