Showing posts with label Simplicity. Show all posts

Friday, March 18, 2016

Color Blocked Craft Table and Accessories

  I have entered this Color Block Craft Table and Accessories project in the Fave Crafts Craft Contest 2016- If you like it please pop on over to their site and VOTE for it! I could win $1000 bucks! Thanks in advance for your support :)
Color block craft table stefanie girard

Having a workspace that inspires creativity and keeps all your craft supplies organized can really make your crafting and art making time efficient and fun. 
How to make a color block craft table squares of fabric recycled books Stefanie Girard

I made this large worktable out of a piece of plywood and Plexiglass with squares of Fairfield Oly Fun Craft Material in between for a modern color block look. The layers are all held together with office supply binder clips. 


The center support of the worktable is a stack of recycled books! The coordinating desk accessories were embellished with all different types of paint and foil. 


The stemware glass balls were painted with Testors paint
The glasses were painted with  Design Master Tint It Transparent Dye Spray Paints
The jewelry box was given a new look with Plaid Ceramcoat Chalk paint
The little square plates were embellished with  Silver Therm-o-web Deco foil scissors. 
The little plastic animals were colored silver with the Testors Enamel paint marker

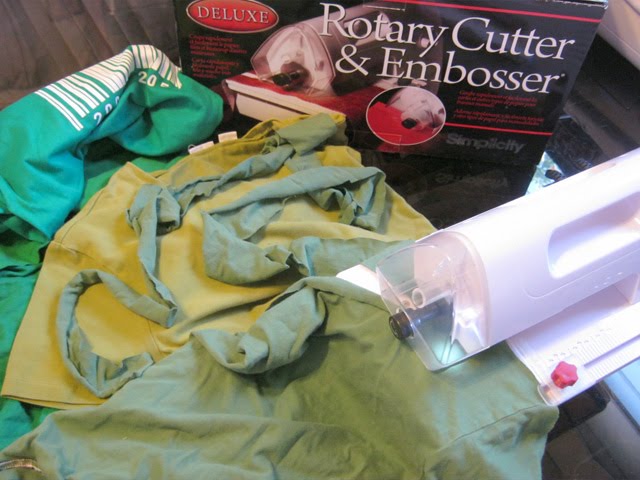
And since I plan on spending a lot of time at my new craft table coloring in books like Leisure Arts' Art of Coloring Mandalas I sewed a new cushion for the vintage stool and embellished it with a Simplicity applique.


I had a scrap of Plexiglass left over from my film industry days and it was a bit smaller than an 4x8 sheet of plywood so I had to trim the plywood down. If you are making this with new materials your plexi and plywood will likely be the same size so you can skip this step.

Fairfield Oly Fun Craft Material squares to make color block craft table stefanie Girard

I used Fairfield Oly Fun Craft Material to cover the plywood. This material comes in pre-cut squares in a great variety of colors as you can see so it was easy to lay them out and arrange them in a pretty pattern.

Then I laid the plexiglass over the squares and secured it with office supply binder clips.

One of the fun things about this color block craft table is that since it isn't permanently secured you can swap out the color blocks anytime!
To give a new look to these vintage glasses I used a variety of Design Master Tint It Transparent Dye Spray Paints.
I masked off the bases so they would stay clear. While painting them I placed them on top of some cardboard containers. This made it easy to rotate the glasses for nice even coverage

scissor transfer scissor art to plate stefanie Girard
To embellish the little plates I die cut a piece of Therm-o-web Easy-cut adhesive and applied Silver Therm-o-web Deco foil.
deco foil silver add scissors to plates Stefanie Girard
I am eager to try this technique on all sorts of recycled surfaces.
Testors paint glasware stem Stefanie Girard
The next color blocked item on my craft desk was this piece of stemware that features little ball shapes. I painted each one with a color of Testors paint.
Testors enamal marker paint toy animals Stefanie Girard
A project I see on Pinterest a lot is upcycling little toy animals by painting them with metallic paint. The Testors Enamel paint marker worked great for this!
chalk paint upcycle jewelry box drawers Stefanie Girard
In keeping with my color blocking theme I thought it would be fun to upcycle this jewelry box by painting each drawer a different color within the same color family.
how to paint drawers, chalk paint Plaid, Stefanie Girard

I used a variety of blues, greens and grays of the Plaid Ceramcoat Chalk paint. I used a bit of painter's tape to hold the drawer pulls out of the way while painting. I also took the glass out and scraped the floral image off with a razor blade.
easy slip on pillow cover with corner ties stefanie Girard
I love my vintage step stool but I thought it could use a bit more padding. The easiest way is to make a tie on cushion. I had a slipcover pillow that I could easily make a new coordinating slipcover for.

All I did was fold a piece of fabric over itself right sides facing with about a 4 inch overlap. Before stitching the sides I pined ribbons in each corner facing in.
how to sew an easy pillow cover with ribbon ties stefanie girard
 When turned right sides out I placed ta Simplicity applique on the new pillow cover. 
I am so excited about creating all sorts of things in my new creative space.
how to make a color block craft table with recycled books and fabric squares Stefanie Girard


Thursday, November 10, 2011

How to crochet a Christmas tree skirt

My Halloween decorations aren't even all packed up yet and back in the rafters of the garage and I am already pulling down the Christmas trees! Oy! That's just the way it goes when you get inspired to make something. Today it's a crocheted Christmas tree skirt. I was savoring the pages of the new book Stashbuster Knits: Tips, Tricks, and 21 Beautiful Projects for Using Your Favorite Leftover Yarn and the page you see above has this cool jacket with a circular back and as the book title states it's made from the almighty stash (of which this fiber fanatic has in abundance!)

And the part of my stash I've been savoring and has been calling to me the loudest to work with is Vickie Howell's Sheepish yarn.
How to crochet this Striped Christmas tree skirt:
Gather your yarn and hook (I used a Boye "H" as the yarn indicated)

Note: I made it this way because I might use it with different little Christmas trees I have and some of them don't have removable legs so I wanted to be able to open it up as far as I needed to.
(This photo is of single crochet thought the back loop)
I did this because I think the stripes looked smoother this way.

-Chain 10 (or as many as you need to fit around the base of the tree you think you plan to use it with).

-Cut the end of the yarn and pull through the last loop.
-Tie a bow with the tail from the end and the tail from the beginning.
-Pick your next color yarn and starting at the beginning again 2 single crochets in the back of the first loop.
-Work single crochets around the chain doing 2 stitches in one stitch every few stitches to increase. (Note I don't count I just go with it to keep it flat by eye)
-Do 2 single crochets in the last loop, cut the yarn and pull through the last loop to secure. Tie a bow with the tails.
-That's pretty much it my crochet peeps! Just keep going until you have the size you want.

If you know what tree you are using and it has removable legs you don't have to tie each row together like I did to keep it able to be opened and adjustable.

Another thing I should note here, yes, this book is a knitting book but it is so pretty and inspirational I just happen to prefer when I am working in the round doing it in crochet.

More about the book from Potter Craft:
Stashbuster Knits: Tips, Tricks, and 21 Beautiful Projects for Using Your Favorite Leftover Yarn
by
Melissa Leapman

"This is the latest title from popular knitting teacher, designer and author Melissa Leapman. It includes 21 creative projects and ideas to utilise every last piece of yarn in the stash. It features basic techniques, special tips, alternate colour suggestions and guidance on storing your yarn collection. Popular knitting teacher, designer and author Melissa Leapman offers quick, easy and imaginative new projects designed to make use of all the yarn odds and ends every knitter has. From a tiny baby sweater to a lovely striped wrap, "Stashbuster Knits" provides 21 creative projects and ideas to utilise every last piece of yarn in your stash. Projects are organised by yarn weight and use a variety of techniques including lace, cables, colour-blocking, stripes and fair-isle to make items for men, women, children and the home. The book also includes basic knitting techniques, special tips, alternate colour suggestions and guidance on storing and organising your yarn collection."

Tuesday, September 6, 2011

How to use a Simplicity Deluxe SideWinder to wind thread for serging

I've got a fun little "Tool Time" share today. I scored myself a darling red cotton polka dot sundress at the thrift store but it had a ripped hem and anyway it was too long for my liking. So I thought I'd serge the two hems as it had a lining as well.
It worked dreamy but the "Tool Time" aspect I want to share with you is for some reason I only had 2 spools of red serger thread but I do have a handy dandy Simplicity Deluxe SideWinder and a stash of empty thread spools!
As it turns out thread spools fit on the assortment of bobbin holders that come with the Simplicity Deluxe SideWinder. All I had to do was manually with my finger guide the thread up and down the tall spool to load it as it should be.
Worked like a charm at the slow speed!

Wind on.

Wednesday, August 31, 2011

How to cover an umbrella with a spiral of ruffles

My coy little bunny peeks out from behind the ruffled covered umbrella to say, "hi!"
I decided I needed a shade umbrella to use in the summer and I thought I'd try dressing up a plain one with some ruffles.

The first step was to cut an old lace curtain into strips. This was super easy with my Simplicity Deluxe Rotary Cutter. I made them different widths starting at about 1.5-3.5 inches. I then just sewed down the center of each strip with a gather stitch (fancy term for the longest stitch length my machine will do).
I started to hot glue the widest ruffle strips at the outer edge of the umbrella and worked my way toward the center in a spiral pattern.
I sported my new set of Cathie Filian's fab new Hot Glue Gun Helpers which are so necessary when working with lace as the hot glue seeps through the holes in the lace!
I used a bit of dress makers chalk to sketch the placement of the ruffles.
I did make a tiny modification to one of my Hot Glue Gun Helpers as I have long fingernails so I cut a tiny slit in the top to let my finger nail pop out. I totally give these Hot Glue Gun Helpers a "thumbs up!"

Tuesday, March 22, 2011

Punk rock rubber ducky and super sized winged ducky inspired by the book The Artful Bird

Once a punk rock girl now a punk rock themed crafter. I mean really, don't all rubber duckies need a giant mohawk?
Back in this post I got all my ducks in a row. Now I am putting my crafty touch on them with a bit of inspiration from the fun book The Artful Bird: Feathered Friends to Make and Sew.
At the big box craft store they have these plain white rubber duckies that you can draw on to make them your own. Well, I thought I'd add to them.
Since these little guys were likely to be around water plastic was going to be my material. Off to the plastic bottle stash and I had a nice white bottle to run through the Sizzix die cutter. I was actually thinking a milk jug was going to work but I didn't have one at hand. Imagine that?
This page from The Artful Bird with all sorts of wing surface treatments was my inspiration. Again I had to stick to plastic material to hold up around water and what is great for that?
Why yes, a Tyvek shipping envelope is perfect. And what better way to cut it than with with the Simplicity Deluxe Rotary Cutter with the scalloped or pinking blade to make tons of strips in seconds flat!
I scuffed up the plastic bottle wings a bit with sand paper so the glue would stick better and then laid the Tyvek strips on overlapping them and leaving the outer edges loose so that they would stick up a bit. Then a quick trim for shaping.
Now these guys were too heavy to float without some sponge assistance. I had one wing left and my wacky head thought it looked hysterical as a mohawk, so that is what it became! I had so much fun photographing them floating around.

More about the book:
The Artful Bird: Feathered Friends to Make and Sew
by
Abigail Patner Glassenberg

Join the flock! Create your own aviary of charming, beautifully detailed, one-of-a-kind fabric bird sculptures with basic machineand handsewing, embroidery, and mixed-media craft techniques. The Artful Bird presents 16 incredibly charming, quirky, personality-filled birds for you to make! Through a detailed chapter of step-by-step basic birdmaking techniques and tips, you will not only learn to make these cute creatures, but also discover how to craft your own patterns for almost any bird—real or imagined.

Inside you’ll also find Glassenberg’s creative ideas to give each bird individual character and personality, from using paint and glitter to adding collage elements. Plus, check out an international gallery of birds from other noted fabric bird makers for more inspiration!

Tuesday, March 8, 2011

How to add stretchy straps to a tank top to lengthen it

Today's post is brought to you by the motto "If you cut it up, it will come" Summer that is! I am "D", "O", "N" ,"E", done with the cold!!! I was chatting with someone who originally lived here but now was in New England and they made a snarky "oh you are having weather" out there comment. I don't live here to have "weather"!!!! Come on mother nature work your magic!
A girl can dream of wearing her little fun tank tops and skirts can't she? I pulled out some of my summer tanks and while I love this gray tank for the studded details it is a bit short in the waist so I thought I'd lengthen it at the top straps.
Pretty easy, I just cut along the top seams.
Next to make some new and improved long straps I went to the scrap stash and found a nice chunk of gray t-shirt that had enough fabric to use for new straps.
I cut the sleeves open and after a few passes under the Simplicity Deluxe Rotary Cutter at the 2.5 inch setting I had 4 new straps for my tank. (After I first trimmed off the sleeve hems.)
In keeping with my new "trying to do things more rock n' roll" less rigid I opted for a crazy top stitch to sew the new t-shirt strips onto the tank.

Try as I might to be all irregular about this I ended up with almost perfect 5 point stars by the 4th strap. I just can't do things with out some order creeping back in after repetition sets in.
I would like to note I used my zipper foot because I had to work around a metal stud under the top fabric which I later trimmed so as to expose the stud underneath.
All that was left to do was try on the tank and have some fun tying the straps different ways! This was my favorite with a knot tying the front strap to the back seam and the back strap at the front seam. I tried bows at the shoulder and a few other places but the knots with the double strap effect seemed to win.

Happy cutting all y'all!

Tuesday, March 1, 2011

Giant Recycled T-shirt Shamrock craft decoration for St. Patrick's Day

I love crafting "green", both eco-friendly and for St. Patrick's Day
I like working in all different scales. I did two fun crafts for St. Patrick's day. One tiny little recycled wool felted sweater shamrock pin and these big shamrock wall decorations out of hangers and t-shirts. Read on for the recycled t-shirt and wire hanger wall St. Patrick's day shamrock. I'll be posting the tutorial soon for the recycled sweater shamrock!

First I went to the old t-shirt stash for some green t-shirts and to the closet for some wire hangers.
To cut the t-shirts into strips I ran them through my Deluxe Rotary Cutter. This made the job so easy and quick. I set the Rotary Cutter to about 2.5 and I got about 5 yards of t-shirt strips from each shirt. I just kept cutting around and around.
I bent 4 hangers each in kind of a "heart" shape.
Then I taped them together with a bit of packing tape and wrapped them with the t-shirt strips. I wrapped with one color to cover the hanger and then with the other color loosely to make a candy can like stripe. The big shamrock took 2 t-shirts to cover. So I had one t-shirt all cut into a strip so I bent one more hanger and made a little shamrock.
Blog Widget by LinkWithin