Wednesday, August 31, 2011

How to cover an umbrella with a spiral of ruffles

My coy little bunny peeks out from behind the ruffled covered umbrella to say, "hi!"
I decided I needed a shade umbrella to use in the summer and I thought I'd try dressing up a plain one with some ruffles.

The first step was to cut an old lace curtain into strips. This was super easy with my Simplicity Deluxe Rotary Cutter. I made them different widths starting at about 1.5-3.5 inches. I then just sewed down the center of each strip with a gather stitch (fancy term for the longest stitch length my machine will do).
I started to hot glue the widest ruffle strips at the outer edge of the umbrella and worked my way toward the center in a spiral pattern.
I sported my new set of Cathie Filian's fab new Hot Glue Gun Helpers which are so necessary when working with lace as the hot glue seeps through the holes in the lace!
I used a bit of dress makers chalk to sketch the placement of the ruffles.
I did make a tiny modification to one of my Hot Glue Gun Helpers as I have long fingernails so I cut a tiny slit in the top to let my finger nail pop out. I totally give these Hot Glue Gun Helpers a "thumbs up!"

Tuesday, August 30, 2011

Cherub and horseshoe photo du jour

Good luck little angle!

And good luck to all ya'll readers in your crafting!

Craftside- A behind-the-scenes peek at our crafty world
This week at Craftside there is a tutorial on how to fold an origami mosquito and enter to win a copy of the book Origami 101, how to treat a dog when its overheating, dehydrated and sunburned, some art from Gary Panter, and how to make your own crackers with a dehydrator.

Cindy Gimbrone Beads
Looking for a unique idea to display your handcrafted jewelry? Cindy's here to lend you a hand!

Crafty Princess Diaries
Tammy looks ahead at the school year that is already filling her calendar with oodles of projects and commitments.

Eileen - The Artful Crafter
Did you love finger painting as a child? Here’s a – sort of – grown-up version you might enjoy.

Mixed Media Artist
Shrink plastic buttons? Yes!! Consider all the possibilities...

Stefanie Girard's Sweater Surgery
Spooktacular crochet eyeball pattern!

About Family Crafts
Take a moment to read some crafty money saving tips and then take a few more to publish your own!

Aileen's Musings
This week Aileen offers you a fun Altered Cabinet card tutorial and freebie downloads stop by and get inspired to make some fall art!

Carmi's Art/Life World
Carmi has a new card featuring a sweet elephant!

Tuesday, August 23, 2011

How to crochet eyeballs with Debbie Stoller's Washable ewe yarn

One set of eyeballs says to the other,"________________".
I really don't know what they are saying to each other but they do make me laugh.
Is it crazy that I am giving my Halloween decoration eyeballs costumes now? Howdy partner!
If you like my latest set of eyeballs and want to make yourself a set grab a hook and yarn and get crocheting.

I used a size "I" hook and some of the new Stitch Nation by Debbie Stoller Washable Ewe Yarn.

This is the general pattern, I'm not really exact about my crochet and I purposefully made my eyeballs slightly different sizes so they would have a bit more personality.

Black yarn:
Chain 1 and then 7 single crochets in first loop. Slip stitch into first stitch.

Change color to iris color:
Single crochet 2 rounds increasing approximately every other stitch to create a dome shape.

Change color to white:
Single crochet for 2 rounds again increase approximately every 2 to 3 stitches.

1 round of single crochet with no increases or decreases.

Single crochet decreasing approximately every 5th stitch until you have a hole about the size of a marble.

Add stuffing and a marble or two.

Finish crocheting and stitch closed.

Read, Craft, Repeat Spooktastically!

Sunday, August 21, 2011

Best combo of car quotes from the Los Angeles Freeways

This is the most awesome photo! This was a big ol' SUV cruzin' up the 5 freeway with Bad Girl emblazoned across the back window in the biggest type that would fit with an 80's "Baby on board" yellow warning sign on the side window. Doesn't this just crack you up??? And I know you're wondering just what the Bad Girl Momma looked like driving this car....we'll let me just say she was quite formidable looking and I would say both signs we're most likely VERY accurate!

OK, now that I've provided you with a moment in time from the mean streets (uh freeways) of Los Angeles onto craft links:

Craftside- A behind-the-scenes peek at our crafty world
This week at Craftside there is a fun article all about Jeannine Stein author of Adventures in Bookbinding which you have a chance to win just by leaving a comment in the post, an idea for using an unusual element as a curtain tieback, a bunny poem and how to create a hierarchy and system for type.

Craft Gossip Recycling

Enter to win a Cricut "Fancy Frames" Cartridge.

Stefanie Girard's Sweater Surgery
See how to make a Fancy Framed cartoon greeting card.

Carmi's Art/Life World
Carmi shares a post she wrote for John Bead using embossing powders and metal.

Crafty Princess Diaries
Tammy shows off a luxurious new baby afghan made with organic cotton yarn.

Eileen - The Artful Crafter
Eileen takes a precious amethyst necklace from dull to dramatic.

About Family Crafts
The current make-it-over crafts challenge is all about teaching math using crafts... Come play along!

Beading Arts
The "Mostly Metal" challenge was a great success, many thanks to Michelle Mach! Come and see all the fun pieces that were made.

Wednesday, August 17, 2011

How to make a framed cartoon greeting card with a Cricut Fancy Frame Die cut

Do you have a stash of little things cut from magazines and newspapers like I do? If you you do then why not use them to make greeting cards? The Cricut Fancy Frames Cartridge is the perfect cartridge to have in your craft arsenal to make all those recycled bits into framed art! (Want to win one? Pop on Over to Craft Gossip and leave a comment by August 25th, 2011 to get yourself in the running for a Cricut Fancy Frames Cartridge.)
Here is how I made my framed recycled cartoon greeting card:
I cut out one of the pretty frames from the Cricut Fancy Frames Cartridge.
To make the card I held the frame onto a piece of scrapbook cardstock and scored it.
Next I folded the cardstock in half on the scoreline and cut the card width. All that was left to do was trim the bottom flush to the top flap. I like cutting my cards after I make my top element as opposed to starting with a card and then embellishing it. I'm just crafty like that.
I felt the frame needed a little texture and color in the form of some Plaid paint and glitter to coordinate with the off-white of the cartoon paper and the blue glitter of my background cardstock.
Well, then I just went ahead and changed my mind and thought it ended up "blending" too much and I picked out another cardstock that contrasted a bit more.

If you can't read the cartoon it is one snowman telling another wearing a pair of way-long plaid pants, "They fit around the waist nicely, but you may want to hem them up a bit."

Thursday, August 11, 2011

3 T-shirts upcycled using inspiration and techniques from the book 101 Tees by Cathie Filian

I had so much fun today giving the t-shirts in my closet a "new and improved" look with the t-shirts I had in my stash that had great graphics, a fun Plaid Metallic Iron-On fawn and a whole lotta inspiration from Cathie Fillian's new a-mazing book 101 Tees: Restyle + Refashion + Revamp.
First up I embellished a plain top with a recycled graphic safety pin and a die cut fabric broken heart.
These were 2 t-shirts I have been saving just because I love the graphics of the safety pins but they are printed on heavy t-shirt/sweatshirt fabric and they are pretty short on me so they aren't getting worn as is.

As I say......."scissor time"

This is an adorable top on me but in desperate need of some "uniqueness"
I simply rough cut out the image and pinned it onto the t-shirt (while it was on me so I liked the placement). I think this is really important because the image could look great flat but that's not how it gets seen on our 3-D bodies! I added a die cut broken heart to the safety pin applique just like one of the projects in 101 Tees: Restyle + Refashion + Revamp used a bit of this and that.

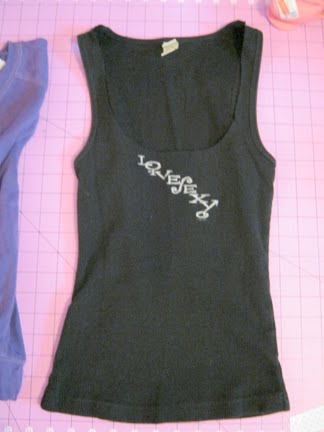
Next up I wanted to add the little safety pin graphic to something and I had this great fitting black tank but not loving the words on it I felt this was a perfect use of the graphic!
I rough cut out again the graphic and pinned it like crazy since I was sewing on a ribbed fabric and it's super stretchy. (Please note my punk "rock" literal pin cushion!!!)
"Before" tank.
"After" tank with 2 laps of crazy contrast thread stitching.

Lastly I tried out one of the cool Fawn Plaid Metallic Iron-Ons on a plain t-shirt.
I also used another of the techniques from 101 Tees: Restyle + Refashion + Revamp to add a gather at the neckline just to spiff it up a bit more!
The directions for the iron-on were easy to follow and I simply love the result!

If you are like me and like to make your clothes truly your own grab a copy of 101 Tees: Restyle + Refashion + Revamp and your scissors and get cuttin'!
101 Tees: Restyle + Refashion + Revamp

By
Cathie Filian

The best way to find a t-shirt that suits you to a T is to make one!

Popular craft personality Cathie Filian has dreamed up more than 101 ways to embellish, customize, and transform the everyday t-shirt into something truly fashionable. Beginners will find Cathie's projects wonderfully easy and creative--and the 10 technique-themed chapters give crafters plenty to choose from. Just take a shirt of any type--from crew neck to long-sleeved--and cut and stitch, embroider, paint, dye, image transfer, or add rhinestones, ribbons, and other trim. The result will be gorgeous!

Los-Angeles based Cathie Filian created, produced, and co-hosted the popular lifestyle shows Creative Juice and Witch Crafts on HGTV & DIY Network. She is a National Spokesperson for Plaid Enterprises, one of the largest manufacturers of art and craft products in the United States, and the author of 101 Snappy Fashions (Lark, 2010). Cathie maintains an active blog (www.cathiefilian.com) and website (www.cathieandsteve.com).

Blog Widget by LinkWithin