Wednesday, March 6, 2019

How to make HOP TO IT Easter lettering sign with die cut letters

die cut letter sign Easter, die cut letters, Liberty Sprinkles, Stefanie Girard, Hop to it
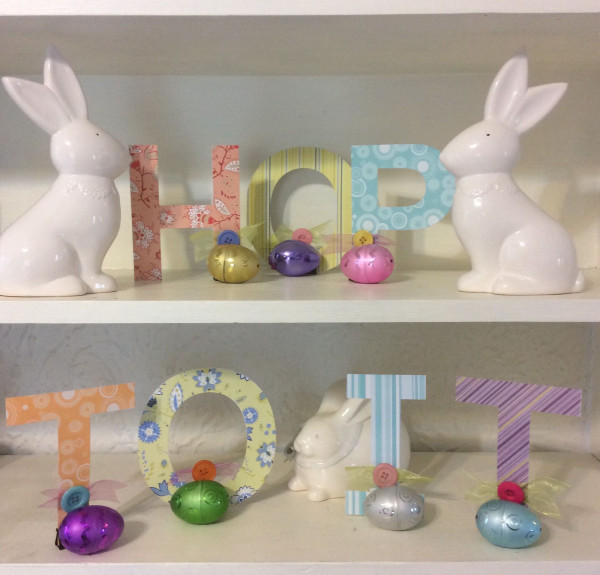
Today is the first day of lent so that means I can officially start crafting for Easter and I whipped up this HOP TO IT sign with 6 inch letter dies, a bit of scrapbook paper, and of all things binder clips!
die cut letter sign Easter, die cut letters, Liberty Sprinkles, Stefanie Girard, Hop to it
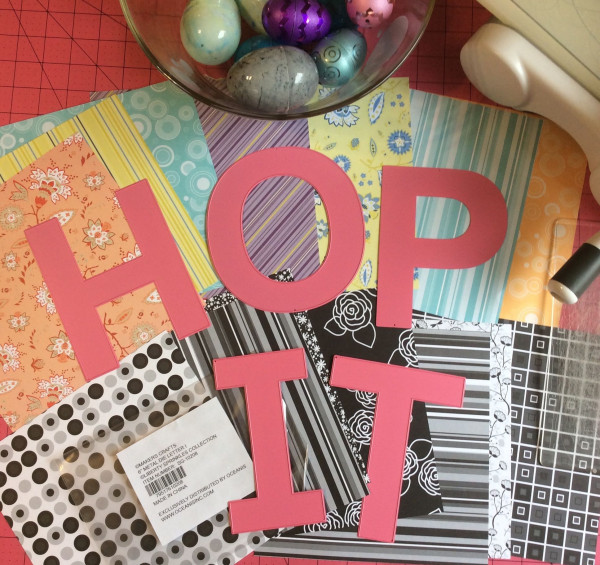
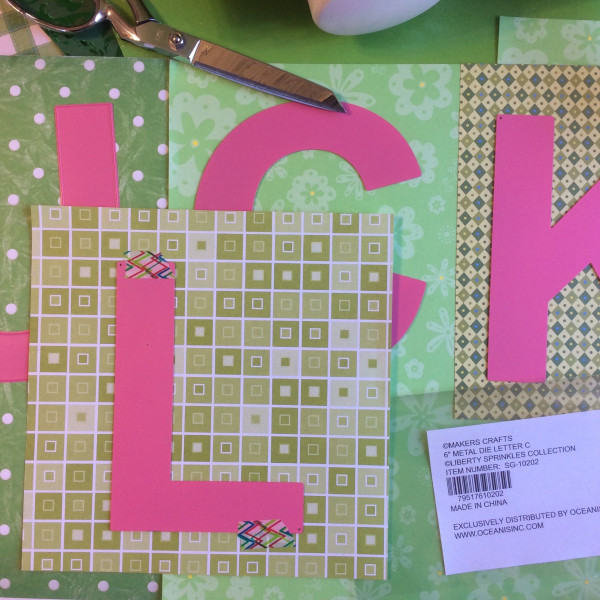
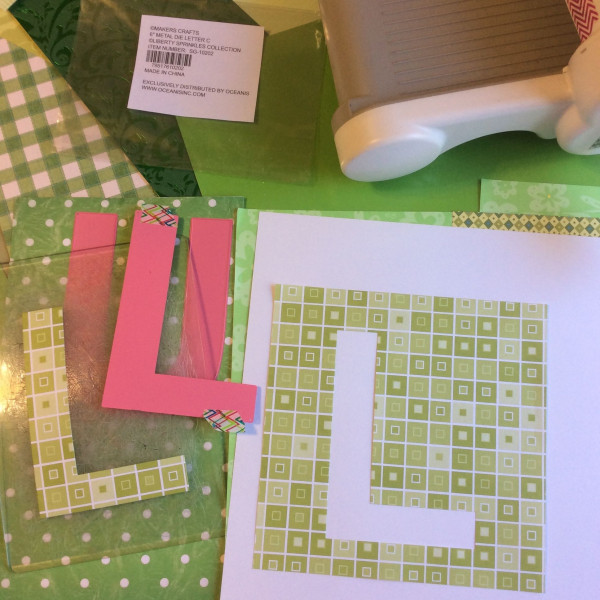
I picked out a variety of colors of scrapbook paper with different prints and then die cut them taking care to place the dies on the squares slightly off center as I will use the outside die cuts in future projects- you know how I love twofers!
die cut letter sign Easter, die cut letters, Liberty Sprinkles, Stefanie Girard, Hop to it
I also cut a set of these letters out in black and white print paper. The only letter that doesn't flip is the "P" so I had to make 2 letter P's. All the other letters when flipped are in the right direction.
I glued all the letters back to back and this made them stand up.
die cut letter sign Easter, die cut letters, Liberty Sprinkles, Stefanie Girard, Hop to it
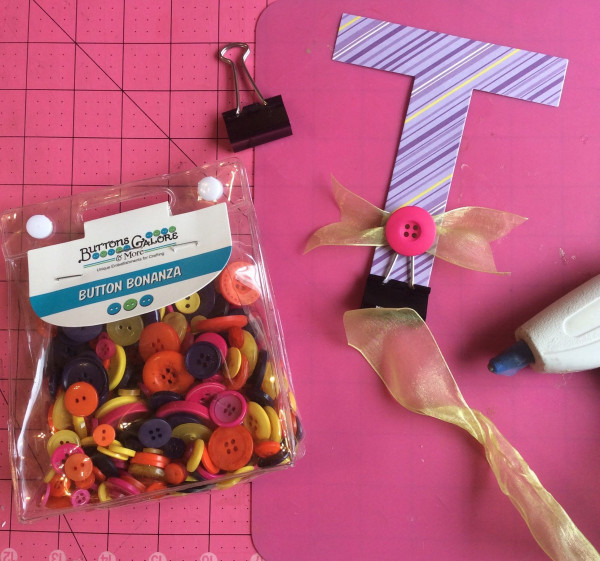
For the stands I used binder clips embellished with organza ribbon and buttons. I arranged the letters on the shelf with pretty Easter eggs in front of the clips and a few bunnies.
Since "HOP TO IT" works as an inspirational quote I will flip the letters over and use the black and white side after Easter. I promise to share it so be sure to subscribe to our email and you won't miss it.

Friday, March 1, 2019

Mixed-media junk journal collage with large die cut letter

die cut letter, stefanie Girard, Liberty Sprinkles, junk journal, collage, mixed-media
Yesterday I posted the easiest Lucky St. Paterick's Day banner tutorial and I promised the first of the projects I plan to make with the outside or negative die cut leftover from the letters.

Along with the recycled die cut paper letter I used one of my watercolor pill paintings that are painted with metallic watercolors.
watercolor paintings of pills Stefanie Girard, metallic watercolor paintings
In addition to the pill painting and the negative outline of the die cut letter K leftover from my Lucky banner project I rubber stamped the quote "Think about it". I may add some washi tape or fabric scraps to this junk journal collage art page but for now I like it with just these elements.

How to die cut the easiest St. Patrick's Day Lucky Banner

Lucky St. Patrick's Day Banner, Stefanie Girard, Liberty Sprinkles, Die cut letters
Don't you feel "Lucky" when you are crafting and you get two items out of one action? I love it and that's just what you get when you die cut these letters out of rectangles of pretty green pattern papers to make a St. Patrick's Day banner.
Lucky St. Patrick's Day Banner, Stefanie Girard, Liberty Sprinkles, Die cut letters
Gather up your green printed papers.
Lucky St. Patrick's Day Banner, Stefanie Girard, Liberty Sprinkles, Die cut letters
Then lay out the Lucky 6 inch die cut letters in the order you want the prints to be.
Lucky St. Patrick's Day Banner, Stefanie Girard, Liberty Sprinkles, Die cut letters
I trimmed down each paper to a rectangle and then die cut each 6 inch banner letter centered in the rectangle. This is where you get the second bonus letter to use the negative die cut for another project. I will post the first of those designs tomorrow so be sure to come on back!
Lucky St. Patrick's Day Banner, Stefanie Girard, Liberty Sprinkles, Die cut letters
I use a bit of washi tape to secure the large alphabet die exactly where I want it cut out on the page.
Then I simply used tiny clothes pins on a length of green cotton yarn to hang the big die cut Lucky letters.

If you were wondering- that is my pet rock in a recycled turtleneck sweater I made. The pin says, "Rockin' it old school" (pun intended) I also added a fun shamrock button to the sweater to add a bit more St. Patrick's Day fun to my display.
Blog Widget by LinkWithin