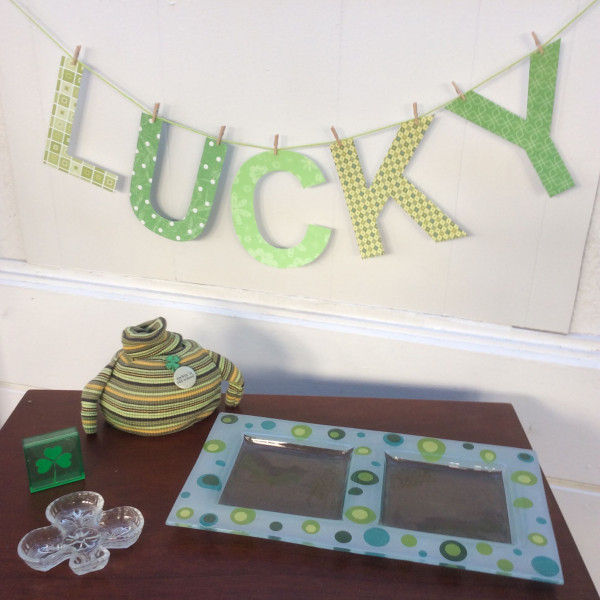
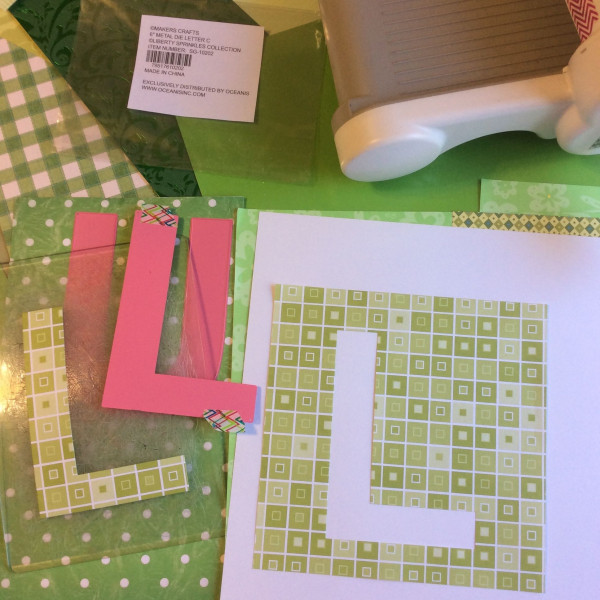
Don't you feel "Lucky" when you are crafting and you get two items out of one action? I love it and that's just what you get when you die cut these letters out of rectangles of pretty green pattern papers to make a St. Patrick's Day banner.
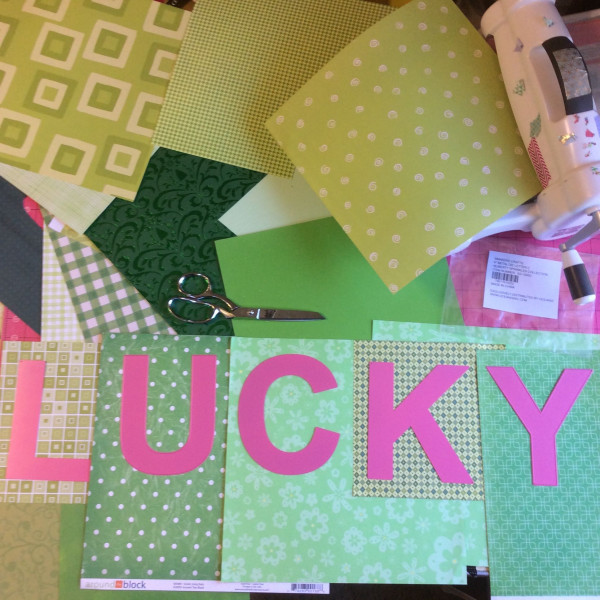
Gather up your green printed papers.
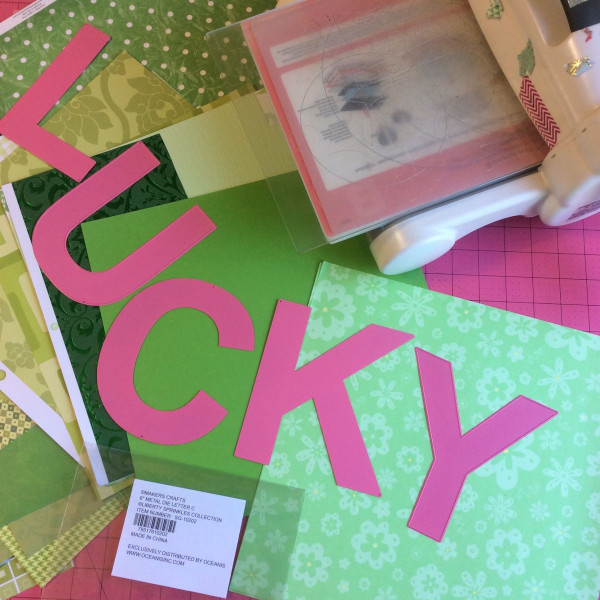
Then lay out the Lucky 6 inch die cut letters in the order you want the prints to be.
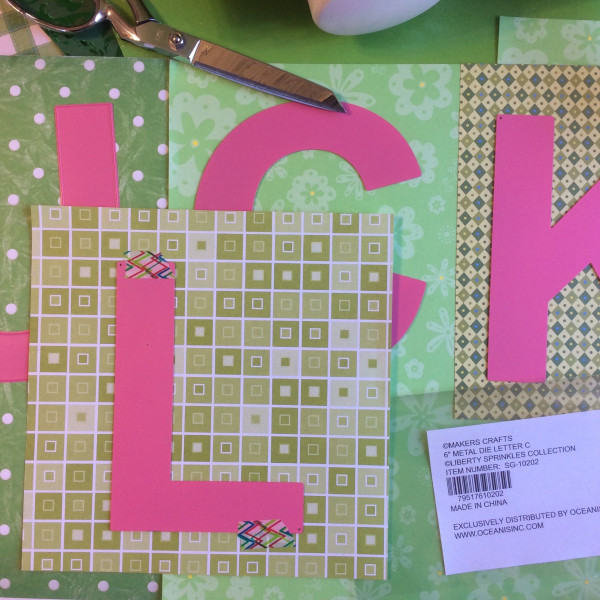
I trimmed down each paper to a rectangle and then die cut each 6 inch banner letter centered in the rectangle. This is where you get the second bonus letter to use the negative die cut for another project. I will post the first of those designs tomorrow so be sure to come on back!
I use a bit of washi tape to secure the large alphabet die exactly where I want it cut out on the page.
Then I simply used tiny clothes pins on a length of green cotton yarn to hang the big die cut Lucky letters.
If you were wondering- that is my pet rock in a recycled turtleneck sweater I made. The pin says, "Rockin' it old school" (pun intended) I also added a fun shamrock button to the sweater to add a bit more St. Patrick's Day fun to my display.
I have a few planners going this year. I have so many ideas and wanted to experiment with lots of techniques so I need a few to work with. For this month of March planner page spread I thought I decorate with large letters across all the blocks. Then I started to add a few fun washi tape details.
The first step was to die cut the letters, L, U, C, K, and Y out of recycled clear plastic to make the letter stencils.
Then trace the letters onto the planner pages as you like them. Then color in each letter. I did some color fades and some contrasting outlines. This was fun to "color" in different ways and maybe even experiment with prints and patterns.
I adhered a strip of washi tape to some scrap address label paper and punched a bunch of hearts. I used the hearts to make a 4 leaf clover on the 17th block and the remaining strip for a decoration up near the month title of the planner.
These techniques would work great for each month by using different words for each holiday that falls within that month.
I love crafting for holidays and it's never to soon to start making little embellishments like this fancy shamrock for the bookThe Complete Photo Guide to Crochet, 2nd Editionfor St. Patrick's Day.
F A N C Y S H A M R O C K
Skill Level: Intermediate
Ch 6, join with a Sl st to form a ring.
Rnd 1: Work 18 sc in ring, join with Sl st to first sc.
Rnd 2: Ch 1 (counts as first sc now and throughout), skip first
sc, 1 sc in each sc around, join with Sl st to beg ch-1.
Rnd 3: Ch 1, skip first ch, 1 sc in each of next 5 sc, [ch 10,
1 sc in each of next 6] twice, ch 12, join with Sl st to beg ch-1.
Rnd 4: Ch 1, skip first ch, 1 sc in each of next 4 sc, [22 sc
in next ch-10 space, 1 sc in each next 5 sc] twice, 24 sc next
ch-12 space, join with Sl st to beg ch-1.
Rnd 5: Ch 1, 1 sc in next 4 sc, *[ch 4, skip 2 sc, Sl st next
sc] 7 times, sc in next 5 sc, rep from * once, [ch 4, skip 2 sc,
Sl st next sc] 8 times, join with a Sl st to beg ch-1.
Rnd 6: Ch 1, skip next sc, 1 sc in next sc, [5 sc in next ch-4
space] 7 times, skip next 2 sc, Sl st in next sc, ch 18 for stem,
1 sc in 3rd ch from hook, 1 sc in each of next 15 ch, Sl st
in next sc on Main Motif, [5 sc in next ch-4 space] 7 times,
skip next 2 sc, 1 sc in next sc, skip next 2 sc, [5 sc next ch 4
space] 8 times, join with a Sl st in first sc, end off.
By Margaret Hubert
This is a comprehensive reference book on all aspects of crochet.
This
book provides a reference for all methods, including Tunisian,
intermeshing, broomstick lace, hairpin lace, and freeform crochet.
Includes step-by-step instructions for all the basic stitches and swatches of 100s of stitch patterns with completeinstructions. Now with:
15 all new projects
20 new stitch patterns (220 in all)
Expanded basics
Hundreds of tips and ideas
Margaret Hubert designs for yarn companies and book and magazine publishers including Crochet, Interweave Press, Quick and Easy Crochet, Crochet Fantasy, and Belle Armoire.
She teaches at yarn shops, retreats, and national gatherings and rarely
misses a national conference in the needle arts field. Among her
specialties, she is a master at freeform crochetand knitting. She is the
author of many books and currently resides in Pawling, NY. Visit her
online at http://www.margarethubertoriginals.com and http://margaretshooksandneedles.blogspot.com.
As an Industrial Design major in college I think package design was one of my favorite classes. Now as a craft designer I don't design much packaging but making a custom label to celebrate a holiday is doable these days. I found these free downloads for St. Patrick's day graphics and labels and all that was left to do was a little punching with some Marvy Uchida Big punches and some cutting.
I glued the graphics on two more layers of scrapbook paper and then onto the bottle of real maple syrup. The card was made the same way simply layered up the graphic with two more pieces of scrapbook paper.
Shamrocks rock! And making rockin' cuffs with recycled leather rocks!
It was so easy with the heart die and Sizzix die cutter. I simply ran a scrap of green leather through the die cutter 3 times to get 3 hearts and free hand cut a stem. I laid out the hearts and stem on a another scrap of leather and crazy top stitched it. Then I trimmed the scrap to fit on my wrist and sewed Velcro on the ends. That's all there was to it!
I love crafting "green", both eco-friendly and for St. Patrick's Day I like working in all different scales. I did two fun crafts for St. Patrick's day. One tiny little recycled wool felted sweater shamrock pin and these big shamrock wall decorations out of hangers and t-shirts. Read on for the recycled t-shirt and wire hanger wall St. Patrick's day shamrock. I'll be posting the tutorial soon for the recycled sweater shamrock!
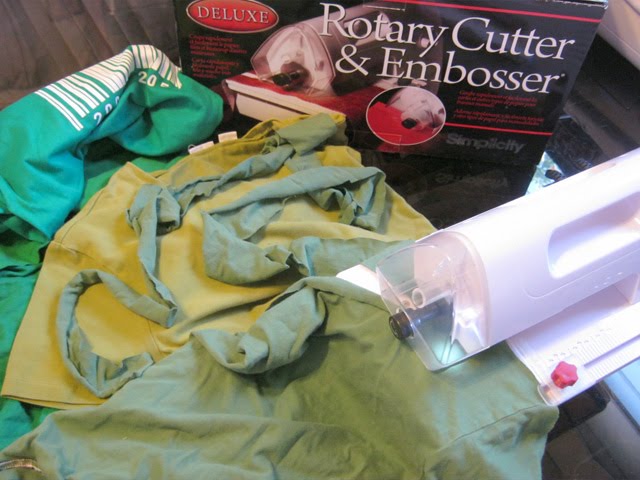
First I went to the old t-shirt stash for some green t-shirts and to the closet for some wire hangers. To cut the t-shirts into strips I ran them through myDeluxe Rotary Cutter. This made the job so easy and quick. I set the Rotary Cutter to about 2.5 and I got about 5 yards of t-shirt strips from each shirt. I just kept cutting around and around. I bent 4 hangers each in kind of a "heart" shape. Then I taped them together with a bit of packing tape and wrapped them with the t-shirt strips. I wrapped with one color to cover the hanger and then with the other color loosely to make a candy can like stripe. The big shamrock took 2 t-shirts to cover. So I had one t-shirt all cut into a strip so I bent one more hanger and made a little shamrock.


 Posts
Posts