Showing posts with label Lark Books. Show all posts

Saturday, June 8, 2013

Recycled magazine page font Father's Day card

Have you missed me? I know it's been a while. I've been blogging every day at Craftside and Craft Gossip Recycling. But today I'm back to give you a fun Father's Day Card tutorial on how to make recycled magazine (or book catalog) letters used to make a Father's Day card using an idea featured in the book Creative Lettering: Techniques & Tips from Top Artists.
I had an old catalog that I thought would work great for cutting up these little block letters.

What made it so easy was that the books were all about the same size rectangle and this font is very boxy. I cut out each book cover first. I chose book covers for each letter that the title would still be exposed even when I snipped out parts to form the letters. It took a few different tries as I ended up using all white background covers so they would coordinate and stand out against the black background paper
I glued the letters down to the card and added two strips of scrapbook paper to make a "shelf". I also kind of had to giggle in that one of the books is Water Paper Paint and another is 1000 Creative Re-use. Nothing like re-using paper images of the words to make another word!

If you are like me and love type and lettering you will love Creative Lettering: Techniques & Tips from Top Artists.

More about the Lark Crafts book

Creative Lettering: Techniques & Tips from Top Artists
by
Jenny Doh
 
" Hand-lettering techniques are a popular and visually dynamic way to add textual elements to crafts, from journals to mixed-media art. Sixteen accomplished contributors—including calligraphers, painters, collagists, card makers, fiber artists, and graphic designers—give their personal perspectives on lettering. They all offer their favorite tools, how they use them, their signature technique with step-by-step instructions and photos, and an alphabet sampler of their own font. Gorgeous gallery images of each contributor's work are also included.
 
Contributors include:
Andy Ainger   •   Francois Begnez   •   Flora Chang   •   Barbara Close   •   Philippe Debongnie   •  Karyn Denten   •   Aimee Dolich   •   Lisa Engelbrecht   •   Pam Garrison  •   Stine Kaasa   •   Rhianna Lederman   •   Martha Lever   •   Linda Schneider   •   Jessica Swift   •   Madeline Tomkins   •   Lori Vilegen   •  
 
Jenny Doh is the former Editor-in-Chief of Somerset Studio magazine and the President and Founder of crescendoh.com. Jenny serves regularly as keynote speaker across the nation to deliver messages related to creative passion, authentic leadership, effective communication, and focused compassion. For her leadership in publishing and the art and crafting community, Jenny was recognized by Folio magazine as one of the top 40 leaders within the publishing industry. Jenny is the author of several books, including Hand in Hand and We Make Dolls (both Lark). She lives in Santa Ana, CA."

Thursday, March 28, 2013

How to make a pom pom Easter Bunny holding a carrot

Did you know you can sculpt pom poms? Well you can. I think pom poms have to be in my top 10 craft materials to cut up! Today, just in time for Easter, I have a cute pom pom bunny inspired by the ultra adorable book Adventures in Pompom Land: 25 Cute Projects Made from Handmade Pompoms.
 Here is how I made my pom pom bunny:
I gathered up a bunch of pre-made pom poms as I have a huge stash. I know the handmade one's are great but I was in the mood to make a bunny quick!

Also needed was a tiny bit of white felt, a pink marker, scissors and hot glue gun.

You can see the sizes I started with in the photo.
I hot glued the large and medium together then trimmed them to be more of an "egg shape".

I trimmed the other large pom pom down to an egg shape (or bunny head shape) as well then glued it onto the body.

Next the hands, feet and tail were attached.

I cut out the ear shapes, colored them with a bit of pink marker and then glued them into the head pom pom.

To make the pom pom carrot I  trimmed the orange pom pom down...a lot! and then glued a tiny green pom pom on top.

The eyes and nose were glued on and the carrot between the paws.

And if you are like me and like to make things out of pom poms you will love this cute book!

More about the book from Lark Crafts:
  Adventures in Pompom Land: 25 Cute Projects Made from Handmade Pompoms
by
 Myko Diann Bocek

"Enter the wonderful land of pompoms, where cute critters and creative adventures await you. All the projects in this unique collection begin with handmade, not pre-purchased, pompoms, and every step is beautifully laid out with easy-to-follow instructions and plenty of images. Crafters can then create 25 charming creatures—from a sweet little bluebird to a lop-eared bunny—out of wool yarn, roving, and felt. It's fun to do and every project is off-the-charts adorable!"

Thursday, February 7, 2013

How to give Aminekos recycled glove punk rock mohawks

OK sometimes, well a lot of the time, I get silly with my Aminekos. That is just the way they are, they bring out my silliness.
Today the aminekos got recycled glove punk rock mohawks inspired by the super silly book Return of the Stupid Sock Creature.
 They couldn't be easier to make.
 Simply stuff the fingers of a glove with a bit of batting. Then fold up the cuff to the inside. I just pinned the mohawk onto each of their heads but you could stitch them. I think the aminekos like their new spring "do". I know I do!

More about the Lark Crafts book:

Return of the Stupid Sock Creature
by 
John Murphy 

"They're back! John Murphy is famous for his weird and wacky sock creatures. In this follow-up to Stupid Sock Creatures, John shares the spotlight with guest designers in 20 projects that push the boundaries of stupid with crazy-cute quadrupeds, two-headed beasts, pop-eyed monsters, and more. The wide range of difficulty--from a simple one-sock monster to a four-sock extravaganza--means this book will attract all levels and types of crafter. And thanks to John's clear and humorous instructions, absolutely nothing is intimidating. Well, except for Piethagorus. But don't worry, he only eats pie (we think)! 

John Murphy created the Stupid Creatures on a whim in 2003. Since then, he has enjoyed nearly a decade making plush monsters. He's been featured in ReadyMade magazine and the Washington Post and has taught workshops nationwide. John is the author of Stupid Sock Creatures and Closet Monsters. He currently works as a counselor for at-risk kids and their families, and he hopes to do it forever. Visit stupidcreatures.com to see more of John's plush work. He lives in Bessemer City, NC."

Thursday, November 8, 2012

Altered book page silhouette inspired by the new book Journal It!

The new book Journal It! Perspectives in Creative Journaling by Jenny Doh is so filled with inspiration I just had a blast flipping through and getting excited about making something. This page from Journal It! is all about creating a reverse silhouette but I wanted to do a little work in one of my altered books so I took the idea of a large silhouette and simply did it more on the traditional style but with a similar cool glitter pink print paper.
 Here is my final page with my pink glitter silhouette.
 First I took down a photo of me that just happened to look a lot like the one in Journal It!. I imagine most of us sported little pig tails at one point or another...right?
 I traced the photo and then scanned in the tracing.
I enlarged it as big as I could and printed it out. Then cut out the large outline. I then traced the outline on the backside of the pink glitter paper (I flipped over the outline too).
Then I cut out the pink glitter paper and found a page in the book I was altering that I thought looked good and the writing worked. I have to say I love the large scale of the silhouette, they tend to be little.

If you like experimenting with different styles in your journaling, mixed-media, or altered books I bet you will love:

 Journal It! Perspectives in Creative Journaling
by
Jenny Doh

More about the book from the publisher Lark Crafts:

"Book arts, journaling, and collage come together in Journal It!, where 19 mixed-media artists showcase their signature techniques, tips, and creativity boosters. The featured work ranges from lettering expert Jill K. Berry's beautifully calligraphied travel journals to Jeannette Sclar's whimsical gardening books, and the techniques include everything from toner-based transfer to stitching with fabric and paper. With over 200 inspirational photos to guide them, even beginners can create works of art right from the start."

Monday, October 8, 2012

How to make a maple leaf rubber stamp from an eraser

The book Making an Impression: Designing & Creating Artful Stamps is packed full of great ideas, designs and projects that feature the stamps you make. My favorite is the idea for stamping on vintage gum labels of which I happen to have a stash. Go figure. I recently got out some of my fall cookie cutters which included a maple leaf and I thought that a maple leaf image would make a cute rubber stamp.

 So I downloaded an image and sized it.

 Then I cut the image out of the paper. To transfer the image onto the eraser I used a silver Sharpie as my eraser is black.
 I just held the image over the eraser and drew out from the paper onto the eraser.
I trimmed the eraser down to a smaller square around the maple leaf.
Then I simply cut along the shape always working from the inside drawing my cut lines out toward the edge.
Then I cut the eraser depth off of the outside area.

To stamp my images I used a red Brush tip Sharpie. Worked like a charm to give me a vibrant impression that matched the red of the gum labels.


More about the book from the publisher Lark Crafts:
  Making an Impression: Designing & Creating Artful Stamps
by
Geninne Zlatkis

"Popular illustrator and stamper Geninne Zlatkis has a passion for nature and color that distinguishes her work. These 20 beautiful projects--including cards, an embellished journal and tote, and decorative wall pieces--provide the keys to Geninne's creative process and image-making process. In addition to technique-specific primers with step-by-step photos of the essentials, Making an Impression includes 50 motifs showcasing Geninne's signature designs that crafters can copy and use for image transfers, stamp designs, and collages.

Geninne Zlatkis is an illustrator (etsy.com/shop/Geninne) and blogger (geninne.com). She uses a wide variety of techniques (painting, collage, writing, stamping, and more) in her whimsical work. Her illustrated prints and licensed designs have been available through Urban Outfitters, and her designs are featured on an organic cotton fabric line with Cloud 9 Fabrics and a pocket planner from Galison. Geninne's hand-carved stamped-cards project was included in Craft Hope (Lark Fall 2010). She lives outside of Mexico City in Querataro, Mexico."

Sunday, August 26, 2012

Halloween bead and button spider from the book Artful Halloween

Have you started your Halloween crafting? Well I just did with the super inspirational book Artful Halloween: 31 Frightfully Elegant Projects.
 I have seen spiders made from beads before but I love how Susan mixed it up and used a button for the spider body. Using the easy to follow tutorial in Artful Halloween: 31 Frightfully Elegant Projects I whipped up a trio of spiders that looked great on my black sand zen garden (or inspiration word of the day tray).
I tried a lighter weight gauge wire and different beads so this project is super flexible. I bet probably whatever you have in your stash will work great! I can't wait to make more of the projects in Artful Halloween over the next few weeks to dress up ye old casa for Halloween.

More about the book from the publisher Lark Crafts:
Artful Halloween: 31 Frightfully Elegant Projects

by
 Susan Wasinger

"These 30+ costume, pumpkin, and home-decorating ideas are not just beautiful--they are scary beautiful. From unique pumpkin decorations to a “blood”-splashed dinner-party centerpiece to a Yard Specter made from two poles, a string of lights, and torn, draped fabric, these creepy but stylish Halloween projects will give your home a spooky, sophisticated look . . . with gothic flair!

Susan Wasinger designs houses, products, books, and magazines. Her work has been featured in Metropolitan Home, Stitch, Natural Home, and Piecework magazines, as well as on HGTV. She is the author of several books, including The Feisty  Stitcher (Lark, 2010). She  lives in Boulder, CO."

Tuesday, June 12, 2012

Creating with inspiration from the book The Collage Workbook

I love creating things that take a minute to figure out. Today I stuck with one of my favorite "slightly off" themes and used a bit of inspiration from the book The Collage Workbook: How to Get Started and Stay Inspired to create my latest mix-media altered book page. If you know your Roman numerals and police codes you will get it. If you scroll down I will tell you if you don't know these two topics.
 Have you figured it out????
OK I'll tell you. the roman numerals are 5150 which is the police code for 72 hour psychiatric hold (AKA-crazy!)

As you can see I have used this as a cross stitch and as the prompt in The Collage Workbook: How to Get Started and Stay Inspired suggests using numbers in creating, what better number...or is it letters really? Letters representing numbers? Another layer in the mystery.....

All I did was go through magazines and cut the letters out "ransom" style and glue them on a page that also contains an interesting idea all be it a little "off" shall I say and maybe even appropriate for the number designation????? Hmmmmmm.

If you too like creative prompts to help guide you I bet you will like The Collage Workbook: How to Get Started and Stay Inspired as much as I do!
More about the book from the publisher Lark Crafts:
The Collage Workbook: How to Get Started and Stay Inspired
by
Randel Plowman

"Both a popular hobby and a recognized art form, collage encompasses a wide range of creative styles and techniques--explored here by the creator of the popular A Collage a Day blog. Offering step-by-step instruction, visual inspiration, and even a library of copyright-free images, this hands-on guide covers all the necessary materials, tools, and know-how, from adding color and transferring images, to décollage (tearing away layers). And to spark the reader's imagination, there are 52 creativity prompts, such as a collage using the letters of a single word.

Randel Plowman is the founder of the popular blog A Collage A Day (http://acollageaday.blogspot.com). His art has been exhibited in solo and juried exhibitions throughout the United States and abroad; cited in The New York Times and USA Today; featured in How Design, Artist Magazine, and Somerset Studio; and graced the covers of numerous books. Randel resides in Madison, Wisconsin."

Wednesday, May 30, 2012

How to make a decoupaged 4th of July wreath

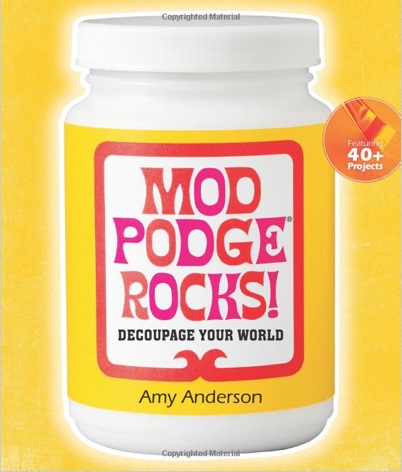
 I'm having so much fun making new decorations for each holiday and this is my latest creation inspired by the book  Mod Podge Rocks!: Decoupage Your World I made for 4th of July.

This wreath was one I originally covered in tiny pine cones and it had lost a few so I decided to recycle it into a new one for summer.


It didn't take long to peal off all the pine cones. I went to the fabric stash and gathered up some red, white and blue fabrics. This wreath project featured in Mod Podge Rocks! was my inspiration.
I liked how cheery it was and the wrapping and decoupage seemed like it would work great with fabric.

I pinned my fabric strips in place and then spread on the Mod Podge to the front and sides. The pins had the added benefit of keeping the wreath elevated. Talk about a crafting twofer!

After the Mod Podge was dry on the 3 sides I spread it on the back taking the pins out as I went and smoothing down the fabric ends.

All that was left to do was glue a few toy army men on and wrap the wreath with a bit of star spangled wire.

If customizing your world by decoupaging with Mod Podge is your thing you will truly be inspired by the book:

 Mod Podge Rocks!: Decoupage Your World
by
Amy Anderson

More about the book from Lark:
"Since 1967, crafters have entrusted their most treasured creations to Mod Podge--the number one, all-in-one glue, sealer, and finish product that's water-based for easy cleanup and totally non-toxic. The popularity of Mod Podge continues to grow, as does its product lineup that now includes Sparkle, Outdoor, Dimensional Magic, and Fabric formulas.

Mod Podge Rocks! features over 40 simple, inexpensive decoupage projects that showcase the versatility of this celebrated product.  Contemporary, fun, and welcoming--just like author Amy Anderson's popular Mod Podge Rocks! website-the book includes everything from home accessories and holiday décor to wearables and jewelry.  Joining Amy herself as guest project designers are some of the hottest names in crafting, such as Cathie Filian and Candie Cooper. A basic section outlines the simple techniques, and each project features beauty shots, easy-to-follow instructions, and how-to photos."

Thursday, August 11, 2011

3 T-shirts upcycled using inspiration and techniques from the book 101 Tees by Cathie Filian

I had so much fun today giving the t-shirts in my closet a "new and improved" look with the t-shirts I had in my stash that had great graphics, a fun Plaid Metallic Iron-On fawn and a whole lotta inspiration from Cathie Fillian's new a-mazing book 101 Tees: Restyle + Refashion + Revamp.
First up I embellished a plain top with a recycled graphic safety pin and a die cut fabric broken heart.
These were 2 t-shirts I have been saving just because I love the graphics of the safety pins but they are printed on heavy t-shirt/sweatshirt fabric and they are pretty short on me so they aren't getting worn as is.

As I say......."scissor time"

This is an adorable top on me but in desperate need of some "uniqueness"
I simply rough cut out the image and pinned it onto the t-shirt (while it was on me so I liked the placement). I think this is really important because the image could look great flat but that's not how it gets seen on our 3-D bodies! I added a die cut broken heart to the safety pin applique just like one of the projects in 101 Tees: Restyle + Refashion + Revamp used a bit of this and that.

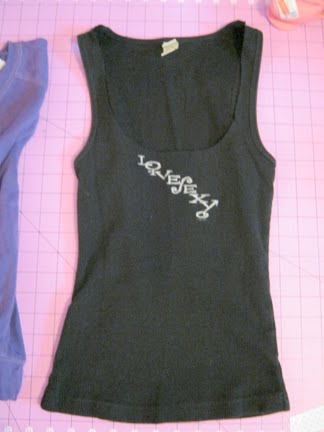
Next up I wanted to add the little safety pin graphic to something and I had this great fitting black tank but not loving the words on it I felt this was a perfect use of the graphic!
I rough cut out again the graphic and pinned it like crazy since I was sewing on a ribbed fabric and it's super stretchy. (Please note my punk "rock" literal pin cushion!!!)
"Before" tank.
"After" tank with 2 laps of crazy contrast thread stitching.

Lastly I tried out one of the cool Fawn Plaid Metallic Iron-Ons on a plain t-shirt.
I also used another of the techniques from 101 Tees: Restyle + Refashion + Revamp to add a gather at the neckline just to spiff it up a bit more!
The directions for the iron-on were easy to follow and I simply love the result!

If you are like me and like to make your clothes truly your own grab a copy of 101 Tees: Restyle + Refashion + Revamp and your scissors and get cuttin'!
101 Tees: Restyle + Refashion + Revamp

By
Cathie Filian

The best way to find a t-shirt that suits you to a T is to make one!

Popular craft personality Cathie Filian has dreamed up more than 101 ways to embellish, customize, and transform the everyday t-shirt into something truly fashionable. Beginners will find Cathie's projects wonderfully easy and creative--and the 10 technique-themed chapters give crafters plenty to choose from. Just take a shirt of any type--from crew neck to long-sleeved--and cut and stitch, embroider, paint, dye, image transfer, or add rhinestones, ribbons, and other trim. The result will be gorgeous!

Los-Angeles based Cathie Filian created, produced, and co-hosted the popular lifestyle shows Creative Juice and Witch Crafts on HGTV & DIY Network. She is a National Spokesperson for Plaid Enterprises, one of the largest manufacturers of art and craft products in the United States, and the author of 101 Snappy Fashions (Lark, 2010). Cathie maintains an active blog (www.cathiefilian.com) and website (www.cathieandsteve.com).

Thursday, November 18, 2010

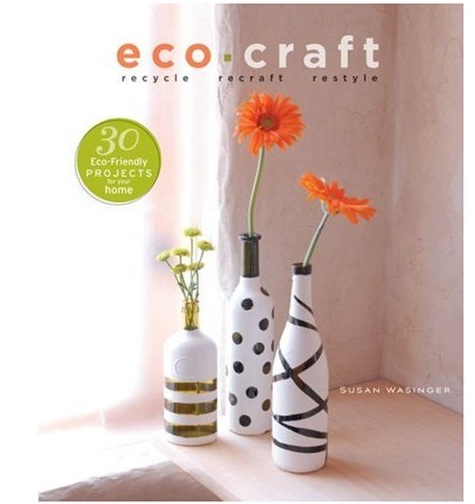
Illuminated broken windshield glass vase inspired by the book-Eco Craft: Recycle Recraft Restyle

Today's post is so special! It is the first one that includes a home movie or as they call it now- a video. I'm not really thaaaat old but, this is one I shot myself and it makes me smile. It was inspired by a project from the book Eco Craft: Recycle Recraft Restyle.
Watch the colors change!


Here is a shot of my broken windshield glass filled shot glass on a changing light base with the lights on.
I had so much playing around with different vases, amounts of glass combos. I tried some marbles in the mix too.
In case you were wondering, because I know you were, "where does one get broken windshield glass?" Well, I am probably one step away from being a hoarder. I saved it from my very first car! I filled a bottle with it even back then (I was 16) because I thought it was pretty and I have had it ever since. The fabulous part of this story, for me anyway, was that I could FIND it! I think that's what keeps me from the official "hoarder" status, that I know what I have and can find it. Because, let's face it, I don't think everyone has a broken windshield glass from the car they drove when they were 16 department in their house.

But as the wonderful idea from Eco Craft: Recycle Recraft Restyle shows, you can use much more readily available bits of glass to make a bottom lit bowl of glass. There are such wonderful and inspiring modern recycled craft projects in this book. If you want to win a copy pop on over to Recycled Crafts at Craft Gossip.com and leave a comment.

More about the book from Lark:


Eco Craft: Recycle Recraft Restyle

by

Susan Wasinger

"Who knew taking care of the planet could look so good? Eco Craft shows how, with 30 truly beautiful home décor projects that elevate environmental consciousness to stylish new heights. Every idea is amazingly clever: who would ever have imagined that plastic six-pack can holders could become a chic Moorish-inspired filigree tri-fold screen? Or that glass baby food jars would make a charming candle chandelier? Every project features at least one beauty shot in a modern home setting, easy-to-follow instructions, and step-by-step color photos, while handy icons spotlight the key techniques, materials, and the estimated time to complete each project."

Oh and if you want to WIN a copy pop on over to Recycled Craft Gossip.com to leave a comment to enter!

Wednesday, November 10, 2010

Recycled bottle lid into a broken heart charm inspired by the book Fantastic Recycled Plastic

We're trippin' the plastic fantastic today in the Plaidbunny test kitchen with some inspiration from the (as the title states) fantastic Fantastic Recycled Plastic:30Clever Creations to Spark Your Imagination.

That's right the little blue broken heart charm is made from the plastic bottle lid you see below:
All I did was warm up the plastic lid with a heat tool and start cuttin'! Then to make the "broken" zig zag line I put a grinding tip on ye old Dremel and etched the line on the back side of the heart. I switched out the grinding tip to a drill bit and made a hole. Oh and I did run the heart back under the heat tool to soften the cut lines smooth.
Off to the stash of recycled bits and some new findings from Blue Moon Beads and I give you my Blue, Blue Broken Heart Necklace.

If you are like me and love making things out of all the pretty colored plastic containers ( I had specifically saved that lid for the great clear blue-ness of it) you will be way-inspired (I sure was) by all the great projects and techniques in:

Fantastic Recycled Plastic:30Clever Creations to Spark Your Imagination
by
David Edgar and Robin A. Edgar

More about the book from Lark Books:

"Plastic is fantastic to craft with—and these imaginative, whimsical creations are out of the ordinary! From colorful canine silhouette pins and magnets and a holiday snowflake decoration to marvelous masks, they turn recycling into art.

Organized by level of difficulty, the items range from simple creations even a schoolchild can do to a fanciful, rolling biplane and a slithering, jointed serpent stuffed with lids and caps. All the necessary techniques—cutting, shaping, fastening, heat-forming, making tabs—unfold in step-by-step photos, along with clear, comprehensive instructions. Sidebars provide extra information on plastics, recycling, and more. Plus there’s a gallery of innovative international work by professional artists to inspire you.

What a great way to get creative…while saving the earth, too!


A former arts administrator and associate professor of art, DAVID EDGAR worked as a production artist on the EPCOT Center and Tokyo Disneyland projects for the Walt Disney World Company. David’s artwork is represented internationally in corporate, institutional, and private collections. Find out more about David at www.plastiquarium.com.


ROBIN A. EDGAR writes profiles, art reviews, and features for national, regional, and local publications. She travels throughout the United States as a keynote speaker and workshops facilitator, teaching reminiscence writing techniques based on her two books, In My Mother’s Kitchen: An Introduction to the Healing Power of Reminiscence and Personal Legacies: Surviving the Great Depression. Find out more about Robin at www.robinedgar.com."

Wednesday, November 3, 2010

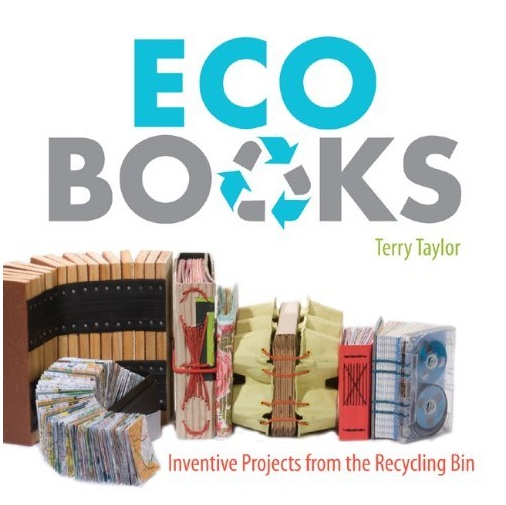
How to make a mini die cut leaf bracelet notebook inspired by Eco Books

I posted a review of the book Eco Books: Inventive Projects from the Recycling Bin over at CraftGossip.com and the wonderful publisher Lark is graciously offering up a copy to one lucky commenter. So pop on over to this post at Recycled Crafts at CraftGossip.com and get yourself in the running. But while you are here check out these fun tiny little notebook bracelets I made with the petal remnants leftover after I made another project.
I am always writing ideas and quotes down and finding a bit of paper sometimes, try as I might to always have a notebook with me, can be a challenge. So here is a solution, make it jewelry.
When you die cut something often times there are other shapes you get in one pass on the die. Such is the case here.
When I ran the flower die through to get a three petaled shape I also got all these singles.

I just punched tiny holes and ran a hair elastic through then and then looped one end of the elastic back through the other to bind my mini petal journal. I liked it all closed and fanned out.

If you like making books and journals out of all sorts of things than I bet you will like


Eco Books: Inventive Projects from the Recycling Bin

by

Terry Taylor

"Here are projects for the “pages”: 40 innovative book-making ideas using recycled and green materials! More than just earth-friendly, they’re also beautiful, clever, and witty, stitched with traditional binding techniques. Egg cartons, wood, beer cans, and cassette tapes morph into covers, while brown bags, coffee filters, and discarded newspapers are transformed into pages. Create a boxed set of cereal box books, an exposed stitch sketchbook out of cardboard and remnants, and even a faux leather journal made from teabags.

In addition to how-to drawings, close-up detail photographs, and simple stitch diagrams, a gallery of eco-books from an international roster of artists provides inspiration."

Blog Widget by LinkWithin