Showing posts with label North Light Books. Show all posts

Thursday, October 27, 2011

How to make a secret window in a Glitter decoupaged book with a Fiskars Everywhere Punch

You know how I love new tools! Today's new toy is the Fiskars Everywhere punch. This paper punch will make a square anywhere you want!
I decided to try it out by making a secret window in a book. The Fiskars Everywhere punch worked like a dream! I punched about 3 pages at a time and I was done in a flash.
The outside of my secret hiding place book (or I was thinking this would be a fun way to give a small gift item like one of my shotgun shell necklaces) needed some help!

I flipped through the book Encaustic Workshop: Artistic Techniques for Working with Wax and saw this page featuring these leaf skeletons and I happen to have a pack of them.

I know this book is all about encaustic but some of the ideas work for decoupage which is what I did with some Plaid Extreme Glitter Paint.

I used both black and gold. I put down an irregular coat of each first. Then another coat of gold. While the 3rd coat of gold was still wet I pressed the skeleton leaves into it and topped it off with a 4th coat of gold.

I have a few other books that will have a "window of opportunity" soon!

More about the book from North Light Books:
Encaustic Workshop: Artistic Techniques for Working with Wax
by
Patricia B. Seggebruch

Find out what happens when mixed media meets melted medium

In its purest form, encaustic painting is as simple as applying melted beeswax to an absorbent surface. In Encaustic Workshop, it becomes much more: a dynamic medium where anything goes and the possibilities are endless.

Packed with step-by-step techniques, helpful tips and diverse examples of completed works, Encaustic Workshop brings all the accessibility and excitement of a mixed-media workshop to your own workspace. If you're a beginner, you'll find everything you need to know to get started. If you're a more advanced crafter or fine artist, you'll discover things you never knew you could do with encaustic.

Instructions and photos will guide you as you learn to:

  • Apply, layer, color and carve wax to create artwork rich with texture and depth.
  • Create collages that combine encaustic with papers, fabric, found objects, image transfers and more.
  • Experiment with charcoal, inks, watercolors, pastels and other mediums to create unexpected effects in the wax.
Then, complete step-by-step projects and an extensive inspirational gallery will show you how you can combine the techniques you've learned to create more complex works.

Sign your creativity up for this Encaustic Workshop - then just melt, paint and play!

A graduate of the University of Colorado, Patricia Seggebruch has been painting in water media, oil and encaustic for about twelve years. She has been teaching workshops at retreats (such as the enormously popular Artfest) since 1998, and she conducts demonstrations for Daniel Smith in Seattle/Bellevue, for ArtMedia in Portland, and for Ampersand Art Supply in Austin, Texas.

Thursday, July 28, 2011

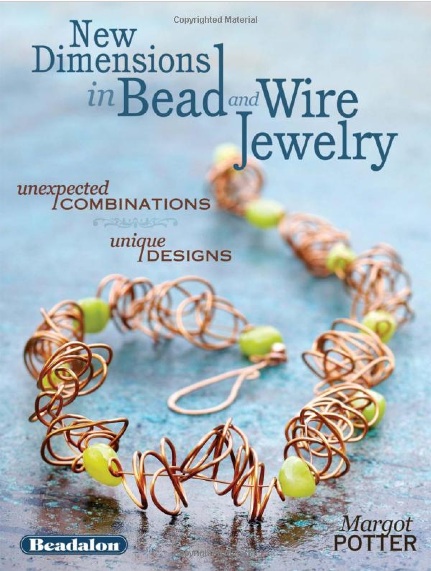
Margot Potter's latest bling sensation-New Dimensions in Bead and Wire Jewelry

Margot Potter tops herself every time! Her latest book New Dimensions in Bead and Wire Jewelry: Unexpected Combinations, Unique Designs is beyond inspiring. I have almost every book she has written and they are just a wealth of sparkly projects and techniques that every jewelry maker can use as a great tool to kick their designs into fabulous-land! (Oh! and want to win a copy? Pop on over to Craft Gossip Recycled to enter to win one)
This pair of upcycled earrings is my first bit of bling inspired by New Dimensions in Bead and Wire Jewelry.
I took my first inspiration from her project titled Amphora. What really caught my eye was her color combo combined with the size and shape elements she chose to work with. I went through my stash to find some square beads to combine with contrasting seed beads.

I used some old plain hoops as my base and wrapped away. I used 3 square beads as Margot did as the rule of 3's makes for a pleasing design and filled the rest of the hoop with the tiny black glass seed beads. I really like light blue and black but I will most definitely be trying the red and sick green combo too!
New Dimensions in Bead and Wire Jewelry:
Unexpected Combinations, Unique Designs


By
Margot Potter

Discover 30 stepped-out projects that explore the possibilities for using wire as a dimensional design feature as well as a structural one through combinations of both hard, soft wire and beads. In addition to basic wire-working techniques, inside New Dimensions in Bead and Wire Jewelry you'll find a thorough introduction to the various types of wire that popular author Margot Potter uses throughout the book. Projects are organized into five chapters, each with a different focus on the type of wire used. Two chapters focus on hard-wire projects, two on soft wire, and a final chapter combines the two wire types together. Troubleshooting tips are sprinkled throughout the book and three variations per chapter give you great additional inspiration!

Margot Potter has published six jewelry-making books with North Light Books. She's a designer, author, freelance writer, consultant, public speaker, actor and vocalist, video host and TV personality. Margot also creates innovative designs for major manufacturers, books and magazines and teaches popular seminars and classes at major craft and jewelry industry events.

Wednesday, July 6, 2011

Deer Card made with a silhouette from the book and disk Silhouette Style

Today I have a "deer" card design for you using one of the silhouettes included on the disk with the book Silhouette Style: Techniques and Template Sets for Papercut Projects.

I love the deer image and have managed to work it into a lot of my designs so when I got the book and it had a deer silhouette I knew just what I was going to make.
I know it's tough to see but I imported the deer silhouette into Illustrator and copy and pasted it to get a second image. Then I flipped it to get the mirror image. I aligned them along the bottom of the paper and printed it out onto a pretty pink cardstock.

A side note here is that I love doing paper cutout work because it is a twofer, you get the surround and the cut out shape. These two deer will definitely be used in the future.
I placed a fun piece of pine branch paper behind the deer silhouettes kind of ironic "camo" style and got my quote for the card at one of my favorite sources- One Up Me. This one says, "He's like camouflage, when we're together, it's like I'm invisible."

More about the book from North Light Books:

Silhouette Style: Techniques and Template Sets for Papercut Projects

by
Nanetta Bananto
Discover the modern versatility of the classic silhouette. The bold lines and strong contrasts of the silhouette are no longer limited to flat, two-color portraits to be hung on the family room wall. In Silhouette Style, silhouette designs take on color, dimension and the 21st Century. Nanetta Bananto teaches you to bring papercuts to life in more than 40 projects incorporating her beautiful, original designs. Create tea-light lanterns, gift boxes, cards, paper dolls and fashion accessories using papercut designs in themes such as sea life, animals, flowers and fashion.

The book includes:

  • Step-by-step instructions for 21 stylish projects and more than 20 variations easily created using the same techniques and designs
  • Tips and techniques on how to cut designs either by hand or using an electronic die-cutting machine
  • A CD-ROM containing all of the cutting design files needed to create the projects, plus bonus designs to expand your creative possibilities

Pull out your scissors or electronic cutter and develop a passion for silhouettes as you create art, gifts, home décor and more!

To read the pdf files on the CD-ROM included in this book, you will need Adobe Acrobat. To read .eps files, you will need a software program such as Adobe Photoshop or CorelDRAW. You may need to convert .eps files to the correct format for your cutting machine, according to the machine manufacturer’s instructions.

Nanetta Bananto is a beadwork, sculpture, clay, painting, calligraphy, fiber and paperarts artist and author of Creative Techniques for Polymer Clay Jewelry (North Light, 2005). Nanetta designs projects for Polyform Products, sells art to galleries and museum shops, has designed numerous CD covers, flyers, menus and t-shirts. She has been working with Accugraphic and will soon sell designs for their Klic-n-Kut systems on their website.

Wednesday, June 22, 2011

Computer Keys are the shape of most of my days it feels like

Today's ATC and card are inspired by the book Inner Excavation: Exploring Your Self Through Photography, Poetry and Mixed Media. One of the questions that is posed to help a creator make art is " What are the shapes of your day?"
Well, I feel like the computer keys on my desk are often the shapes that I spend the most time with. So they became my starting off point.
These are two additional keys I have added to my keyboard. The other main objective some days is to "find" things. If it were only as easy as hitting a key to make it happen.....
I have a book of clip art images that I love to use in my art and cards and funny enough there was an image of computer keys. Another element that is one of my favorites to include is a translation dictionary bit. I used a Spanish dictionary and the word "find".

Lastly I had this great picture of Brigitte Bardot looking like she is looking for something. Well there is the starting off point from Inner Excavation and where it took me. I look forward to trying more of the explorations in Inner Excavation.

More about the book from North Light Books:
Inner Excavation:
Exploring Your Self Through Photography, Poetry and Mixed Media


by

Liz Lamoreux

This book will guide you through the expressions of photography, poetry/journaling and mixed-media as they pertain to exploring how we not only currently see ourselves, but how we can learn to see new things hiding below the surface. Each of these sub-topics features a different contributing artist (or the author) and includes tips, prompts, meditations and other exercises, along with plenty of full color inspiration.

Liz Lamoreux is an editor, poet, photographer, yoga teacher and mixed-media artist living in the Pacific Northwest. She is the organizer of the Be Present Retreats where she teaches alongside nationally known instructors. She has been writing on her blog, Be Present, Be Here, for five years and has quite a following.

Tuesday, June 7, 2011

Interview with Jema "Emilly Ladybird" Hewitt, author of Steampunk Emporium

Today I have not only a fun project to share with you I have an interview with the author of the book the project is from! But wait there's more! If you want to win a copy of the book pop on over to Recycled Crafts at CraftGossip.com to enter to win your very own copy of Steampunk Emporium: Creating Fantastical Jewelry, Devices and Oddments from Assorted Cogs, Gears and Curios.
The cute little gear earrings in the top photo were so much fun to make! And talk about easy! It's one of those instant satisfaction kind of projects. All I did was grab two gears and a hand-full of of Swarovski crystals in assorted sizes and shapes and followed the great directions in Steampunk Emporium and I had a fun pair of Steampunk Gear earrings!

Now onto the interview with Jema "Emilly Ladybird" Hewitt.

How did you first find out about the Steampunk look?

"I trained as a costume designer and always loved the late Victorian bustle era, so I started making my own slightly odd versions of Victorian clothes for dressing up and having tea in, I loved the "almost historical" look of films like Dune and Chitty Chitty Bang Bang, but it wasn't until I read "The Difference Engine" I realised that a genre name had been invented! I suppose I started to notice the altered steampunk Victorian things creeping into books, films and art more and more over the years and thought wow this is so cool! I want to be more involved."

Have you always crafted and designed or did you start so that you could make Steampunk style things?

"I have always been a crafter, even as a small child I was always sewing, gluing or painting something!Although I did well academically at school I realised that I loved designing and making too much not to do it full time, even if that meant a deeply precarious career. I went to college and university to study theatrical design, and met lots of other wonderful creative people in those early years. The great thing is because we shared interests and admired a similar design ethos lots of them have been quietly creating steampunk style art too over the years, and now we are getting back in touch and going "wow" at each other!"

What did you find to be the most fun part of writing Steampunk Emporium?

"I loved thinking up the themes and the characters, imagining all the gadgets and accessories they might want and then working out what those things might look like. The character photography was great fun too, I got the models in my studio, they had fun trying on different looks for the characters then laughed at me as I snapped away, saying "oh no! there's a dinosaur, look scared, oh no actually look totally unconcerened because you haven't seen him yet..." we had a real fun time doing that, then Julian worked to my brief putting the backgrounds in and aging the pictures till the characters came to life! The models are all real steampunk people too, they weren't just hired for the day, they love steampunk too!"

What is your favorite Steampunk object to make?

"My favourite is making my weird gadgets in pocket watch cases, every single one is a totally unique piece of art, and there's lots of scope for modelling,sculpting and using mixed media in those pieces too which I enjoy. I'm a real experimenter, always trying out new materials and pushing things to their limits. I've got into resin in a big way recently so I'm going to have to think of some ways of combining that with my old favourite polymer clay. I like thinking about the functions of each gadget, what the parts might do, how pieces could move or be read in an imaginary situation."

Since most projects use recycled materials do you ever find it hard to use an object you only have one of in a design?

"Oh goodness yes, especially as most of my work is for sale, I have real problems sometimes letting an object go, it can take weeks for me to put a favourite bit into a piece, but it will just keep coming back to me that it's the perfect thing so I'll give in, then I see it being worn by a new owner who obviously adores it, and I think, I'm glad I used that, it's time it had new adventures with a new owner! It's also what makes steampunk so special I think, the importance of handmade one of a kind objects. I know you can buy mass produced "steampunk style" finished pieces of clothing or jewellery now, but to me that's kind of missing the point, as well as expensive..."

What is next on your "to try" list?

"Well, only today I have been playing with fantasy film and "dip it" film, experimenting with making tiny absinthe fairy wings. I'm going to be making more steampunk style tiaras, I want to play with more moving pieces too, gogs and gears that turn and do stuff. When I started writing the book there was hardly any steampunk specific supplies available, for example I had to beg manufacturers to design stamps for me in cog shapes! but now there's so much steampunk style components and tools to play with, I want to have it all! I would love love love to own a sissex big shot and all the tim holtz cutters and textures, mmmmmm."

What is your favorite swear word? (taken from Ravelry)

"lol! I try very hard not to swear too much, but I do say "pants" a lot, (as in the english "knickers"). I got that one from my friend the fantasy artist Jon Hodgson when we were at college. I'm quite a calm person so I don't often feel the need to swear, but if I mess up with the resin or run out of a certain type of bead then I will let a cross "Oh Pants!!!" fly."

What music is your favorite to have on while creating?

"I love electro swing, so when I'm working on the dining table I'll often have a mix of that with classical and blues too. My husband works from home so I usually let him sort the music out, we have similar taste in the main so that's OK. In my studio I listen to radio four pretty much exclusivly, for which most of my friends mock me. I like hearing peoples voices around, without being expected to answer, I get very focused when I'm working and can't form sentences to chat. Working alone can be lonely at times but radio four is always full of interesting educational programs, and plays and stories, I'm always learning something new! Oh dear, I sound like a crazy lady!"

What books are you currently engrossed in?

"I mainly read novels and historical reference books, and I read voraciously, often two or three books at a time, so my current bedside books are... "Cake and Ale" a history of victorian food and eating habits. "Heartstone" by CJ Sansom, a tudor thriller, and Philip Reeves "Mothstorm" which is a riproaring childrens steampunk adventure. My copy of "The Steampunk Bible" just arrived, (in which i'm a featured artist), so i'll be reading that next and I'm hoping to get "Android Karenina" for my birthday..."

Thank you so much for taking the time to share your answers to my questions!

I hope all you Sweater Surgery readers enjoyed the answers as much as I did!

More about Steampunk Emporium: Creating Fantastical Jewelry, Devices and Oddments from Assorted Cogs, Gears and Curios from the publisher North Light Books:

The steampunk genre takes Victorian charm and steam-powered machinery parts and combines that with modern day elements and technology. In Steampunk Emporium, you are introduced to the rich charm and harrowing adventures of the steampunk world. Follow along with author Jema "Miss Emilly Ladybird" Hewitt as she guides you through several beginning-level jewelry techniques (basic wire wraps, using basic findings and so on) as well as some basic work with polymer clay, resin, shrink plastic and other mixed-media techniques. She then takes you on a jaunt through 20 projects divided between five themed chapters, each its own fantastical story. Projects range from decadent jewelry, medals of great distinction, wine charms for imbibers, and many devices of note, all featuring authentic steampunk style and whimsy.

Jema Hewitt is a freelance craft writer, as well as a costume and jewelry designer. She has written articles for both ?Making Jewellery Magazine? and also ?Craft Stamper? on many projects in the steampunk genre. Jema has been at the forefront of the UK steampunk movement for several years and her alter ego, ?Emilly Ladybird?, has a large social media following. She is a regular lecturer and workshop leader in the UK and has written two books on beading and jewelry making with New Holland and has two best-selling DVDs on tiara making (Rainbow Disks).

Thursday, June 2, 2011

Circles of fabric pom poms and paint stick stamping, two techniques from the book Sharing Stitches

Do like to experiment with new techniques even when you don't have a specific project in mind? Well, that's what I have to share with you today. I tried reverse paint stick stamping on fabric and making little fabric circle pom poms both from the book Sharing Stitches: Exchanging Fabric and Inspiration to Sew One-of-a-Kind Projects.


I loved the idea of using my stamps on fabric by rubbing with fabric paint sticks. I used Pentel Arts Fabric Fun Pastel Dye Sticks. Worked like a charm with one exception, this technique doesn't work with word stamps as the image stays in reverse!
The next technique I tried from Sharing Stitches: Exchanging Fabric and Inspiration to Sew One-of-a-Kind Projects was the fabric circle embellishment. In Sharing Stitches these little elements are used to make earrings but I kind of like how it looks as a 3-d pom pom.
There is so much more fun to try in Sharing Stitches: Exchanging Fabric and Inspiration to Sew One-of-a-Kind Projects!

More about the book from the publisher, North Light Books:

Sharing Stitches: Exchanging Fabric and Inspiration to Sew One-of-a-Kind Projects
by
Chrissie Grace

Swap Stitch Share

Join Chrissie Grace and 15 talented artists as they exchange fabrics, collaborate on an art quilt and swap plenty of inspiration on the pages of Sharing Stitches. Stitch by stitch, Chrissie shows you how to create colorful and eclectic projects as unique as the group that sews them, including a patchwork pullover, a lace-embellished headband, a large-scale collaborative quilt and a round robin journal.

Inside Sharing Stitches, you’ll find:

· 22 step-by-step projects designed specifically for swaps and collaborations

· Tips on swapping fabric, as well as hosting and participating in smoothly run collaborations

· Projects and gallery pieces from your favorite artists, including Claudine Hellmuth, Liz Lamoreux, Ruth Rae and more!

Break out your sewing machine, round up your friends and start sewing!

Chrissie Grace is the author of Wild Tiles (North Light, 2006) and Tiles Gone Wild (North Light, 2008). In addition to honing her skills as an accomplished mosaic artist, Chrissie has recently embarked on licensing and is currently creating designs in stationery and wall d?cor. She has had passion for fabric for years and enjoys sewing for herself and family in her free time.

Wednesday, May 18, 2011

Two headed girl in a cage....yup you read right

Yes, this is what I crafted up today. Don't you want to be in my brain? All you really have to do is be in the two books Mixed-Media Paint Box: Weekly Projects for a Year of Creative Exploration and The Black Apple's Paper Doll Primer: Activities and Amusements for the Curious Paper Artist and then grab the camera. Really!
First I saw this page from Mixed-Media Paint Box featuring a design from artist Cory Moortgat that I just fell in love with. It is a photo of a girl behind a wire cage.
The next part of my two headed girl in a cage photo comes from the book The Black Apple's Paper Doll Primer which features wonderfully drawn paper dolls. I do have a fondness for two headed girls. See this post.

So I simply grabbed some wire and fashioned myself up a cage and printed the two head paper doll out about half size. Then I snapped some photos. They make me giggle. I think I am going to put them in a box and in my purse so that when I am out and about they might have some more interesting opportunities....will keep you posted on that!

More about Mixed-Media Paint Box: Weekly Projects for a Year of Creative Exploration
Play With Paint All Year Long!

Incorporating paint into your mixed-media art has never been easier or more fun. Open up your paint box and delve into a year of creative ideas from 45 of your favorite artists. Whether you’ve used paint for years or have been anxious to try a new medium, you’ll find great advice and ideas inside Mixed-Media Paint Box. Each week, you’ll be guided with step-by-step instructions through a different project or technique that will add instant depth and drama to your art!

Inside you’ll find:

+ 52 projects and techniques, one for every week of the year, to inspire a weekly dose of creativity.

+ Tips, hints and suggestions from some of your favorite authors, including Ruth Rae, Claudine Hellmuth, Chrissie Grace, Bernie Berlin and Margot Potter.

+ Step-by-step instructions for jewelry-making, assemblage, journaling, collage and a variety of painting techniques to incorporate into your own art.

Discover inspiration and new ways to express yourself every week inside Mixed-Media Paint Box!

and

The Black Apple's Paper Doll Primer: Activities and Amusements for the Curious Paper Artist

by

Emily Martin

Join the creator of The Black Apple, Emily Martin, on a trip through her magical world of paper dolls, imaginary places, and clever craft projects.

Inside this book you’ll find 21 sweet, mysterious characters with clothes and accessories all their own—from a busy beekeeper’s daughter to a bird-loving librarian. You’ll also find 16 dolls ready to be designed and brought to life by you! Emily will show you how to draw, paint, and personalize your way to a little paper replica of anyone you’d like.

With basic art supplies and the instructions in the book, you’ll also learn to:


• Make a custom wedding invitation or holiday card
• Color, cut, paste, and frame a unique family portrait
• Design your own paper clothes, shoes, glasses, and the like
• Cut and fold an armoire for doll-sized clothes
• Build a paper theater using one of the TK illustrated backdrops
• Direct a stop-motion film with jointed paper doll actors
And so much more!

So sharpen your scissors and get ready for a unique and wonderful adventure.

Thursday, April 14, 2011

How to make a stitched broken heart card

Today I have this mixed-media card project to share with you using a stitching idea from the book Flavor for Mixed Media: A Feast of Techniques for Texture, Color and Layers.
I like using the broken heart as a theme. They are super easy to make. I ran a pretty piece of paper through the Sizzix die cutter and then just sniped the heart in half in a zig zag line.

This page from Flavor for Mixed Media: A Feast of Techniques for Texture, Color and Layers was my inspiration to stitch back up my broken heart. It features words and art by Tonia Davenport.
I glued the heart down to the card and poked holes on each side of the zig zag with the needle. I then stitched it back up with a piece of silver Kreinik thread.

I thought it came out looking pretty cool from the back side too!

If you are like me and like compilation books filled with art, techniques and inspiration from a variety of artists then I bet you will like:
Flavor for Mixed Media: A Feast of Techniques for Texture, Color and Layers
by
Mary Beth Shaw

Creative individuals are typically as passionate about food as they are making art. So while this is a mixed-media technique book, there are underlying analogies of cooking. A dinner-party setting has a guest list featuring contributing artists. You will be introduced to five chapters, or "courses": Color, Layers, Texture, Flavor and Combinations. Each chapter features projects with stepped-out techniques pertaining to that chapter, as well as tabletalk (inspiring insights and constructive tips) from the guests, and sidebars (What?s in Your Pantry) for ideas such as using found objects, painting over ?failed? works and stimulating your brain when you?re out of ideas. Techniques for the projects will show you how to do things like develop layers with stencils, create texture with items like a cheese grater or combine different substrates into one project.

Mary Beth Shaw has been exhibiting in galleries and art shows across the country since 2000. Her mixed-media works incorporate acrylics, pastel, ink, maker and various collage materials. Her pieces have been published in Cloth Paper Scissors as well as in Creative Awakenings by Sheri Gaynor (North Light Books, 2009). Her teaching style and classes have been very well received on the art-retreat teaching circuit.

Wednesday, March 30, 2011

How to make a dotted line and recycled newpaper greeting card

This is my #6 card in my 365 Greeting card project that I am posting over at The Card Album blog but I thought I'd share the tutorial with you here. I used a technique from the book
Mixed-Media Paint Box: Weekly Projects for a Year of Creative Exploration.
You don't tend to think of your sewing supplies as painting tools but that's what Giuseppina "Josie" Cirincione did by coming up with the idea for using a tracing wheel to paint dotted lines.
I grabbed a piece of pink card stock and tried out this fun way to paint dotted lines.
Now that I had this cool dotted line paper it was time to make it into a greeting card.
I had this page from the newspaper that had some cool illustrations by Katherine Streeter and I picked one to incorporate onto my card and off to one of my favorite sources for quotes, One Up Me, and I picked "She's like bell-bottoms, had a fit over boots."

Pop on over to The Card Album blog to see some of my other cards, mostly made out of something recycled and make something too!

More about the book:
Mixed-Media Paint Box: Weekly Projects for a Year of Creative Exploration
By
The Editors of North Light Books

Play With Paint All Year Long!

Incorporating paint into your mixed-media art has never been easier or more fun. Open up your paint box and delve into a year of creative ideas from 45 of your favorite artists. Whether you’ve used paint for years or have been anxious to try a new medium, you’ll find great advice and ideas inside Mixed-Media Paint Box. Each week, you’ll be guided with step-by-step instructions through a different project or technique that will add instant depth and drama to your art!

Inside you’ll find:

+ 52 projects and techniques, one for every week of the year, to inspire a weekly dose of creativity.

+ Tips, hints and suggestions from some of your favorite authors, including Ruth Rae, Claudine Hellmuth, Chrissie Grace, Bernie Berlin and Margot Potter.

+ Step-by-step instructions for jewelry-making, assemblage, journaling, collage and a variety of painting techniques to incorporate into your own art.

Discover inspiration and new ways to express yourself every week inside Mixed-Media Paint Box!

Wednesday, March 16, 2011

Easter Egg Locket necklace

The first line in the description of the book Curious Dreams is, "It's all about creating the curious." and I have to say the book inspired me to do just that. One of the most "curious" charms is a locket and the new line Fairy Tale from Blue Moon Beads has 3 charming lockets including one of my all time favorite shapes- an egg. The egg locket and some of their other new clasps, chain and bead strands were the perfect elements to make a spring mixed media necklace inspired by one of the pieces in the gallery section of the eye candy filled book Curious Dreams.
Now this book is packed full of really cool casting and molding techniques that I am so going to try when I score some epoxy clay but right now it's the tiny fun details that have my creativity hatching.
So I wanted the egg locket to be the focal dangle and I linked it onto this great big beautiful toggle clasp. Coming off each side I used super sized chain (this is Blue Moon Bead's as well although it's from their Fashion Findings line) and on the other side I used a smaller chain and the Fairy Tail Acrylic and Metal Bead strand.

I attached each side while the lengths were long and then held it up to my neck in front of the mirror to decide how long I wanted it to hang. I used safety pins to mark each length. I opened the links on each side and then linked the two ends together since the clasp is in the front.
Since this pretty little enameled egg is in fact a locket and opens up it needed something in it like the inspiration piece had. A great source for tiny photos is the contact sheet you get when you have your photos printed. I had the perfect photo of me and my cousin from a few Easters back with our bunny ears on.
I trimmed the photo down and glued it into the egg locket on one side. I will keep my eyes out for another tiny photo or something else for the other side or to layer on top of the photo but for now your curiosity will just have to be sparked!

More about the book:
Inspired Remnants, Curious Dreams:
Mixed Media Projects in Epoxy Clay

By
Kerin Gale

"It's all about creating the curious. Inside this book, you will be introduced to 26 very unique and unusual stepped-out projects, each offering new techniques using epoxy clay. Two-part epoxy clay can be sculpted and manipulated in a variety of ways and is extremely durable when cured, resulting in amazing effects that are easy to achieve with no sculpting experience necessary! You will learn the basics of working with this new craft medium and then dive into the projects, which feature sculpted and molded epoxy clay inspired by and often combined with altered remnants. Projects include mixed-media pieces such as a small totem, curio cabinet, fish tank and lighting along with personal style and jewelry items fashioned in a curious, Victorian Gothic style.

Kerin is part mad scientist, rogue artist, goddess of software quality, teacher, writer and explorer of all things curious. When not in the studio or garage sailing, she can be found frolicking about deserted beaches seeking out windswept treasures and watching inspiring tales wafting by in a remote area of the southern Oregon coast.

Kerin loves to work with many art materials including resins, found objects, clays of all sorts and metals.

Another great love is sharing with other artists. To that end she has launched an online mixed media art site with their own etsy team, a huge collection of art images, online workshops, featured artists, book reviews and artistic challenges.

She, along with her gifted husband, Charley Slaughter, create mechanical art (automata), sculpture and jewelry and are represented in several galleries. They also teach at national art retreats as well as local venues. Kerin's work can be found in Somerset Studio magazine, Altered Bits Zine, 1,000 Steampunk Creations (Quarry Books July 2011) and 500 Pendants and Lockets (Lark Books May 2008)."

Tuesday, January 18, 2011

Recycled Sweater wire bound Journal inspired by the book Creative Bloom

OK, I'm giggling. I am so inspired by the new book Creative Bloom: Projects and Inspiration with Fabric and Wire I can't stand it. It combines something hard and rigid-wire- with something soft and flexible-fabric- in such cute and endearing ways. So many of the projects and designs in this book were so unexpected. I, of course, had to try something right away!
I gave the flattened wire coil binding a shot. I combined it with my signature recycled wool felted sweater and some big embroidery floss for the stitching. I love the look of the scale of the loops with the thickness of the sweater.
It was pretty easy, although flattening the loops was a bit of a "mind-bender" yeah, pun intended there. If you haven't tried this particular combo of materials, wire and fabric, I bet you will love it like I did. I most assuredly will be trying more techniques as I have yet to really get fabric in my jewelry much and there are some great ideas in Creative Bloom: Projects and Inspiration with Fabric and Wire for just such a need.

More about the book from the Publisher-North Light Books-

"Creative Bloom: Projects and Inspiration with Fabric and Wire
By
Jennifer Swift

Cultivate Your Inner Artist!

Prepare your own garden of self-expression with the creative fabric and wire projects inside Creative Bloom. The seeds of inspiration will be planted as you learn how to make a butterfly-adorned lamp, a sweet bird sculpture, an inspired canvas bag and a sparkling cloud cuff. Each project features innovative techniques that you can use again in your personal artwork.

Creative Bloom features:

· 21 pretty projects for your art studio, home and wardrobe

· Vignettes and advice on gathering the right tools, forcing creative growth, finding inspiration in the seasons and staying motivated

· Step-by-step techniques that show you how sculpt wire, stitch fabric to wire, make fabric pages and more!

Grab some wire and rummage through your fabric stash. It’s time to unearth your creative potential!

About the Author

Jennifer's work has recently been published in Somerset Home and Sew Somerset. She is involved in local craft shows and has an active Etsy shop. She is currently a member of the Fab 5 design team for Singleton Studios, for which she will be creating projects using their lines, as well as developing lines of her own."

Wednesday, October 6, 2010

Bead and Soft Flex crochet bracelet inspired by Heidi Boyd's new book- Wired Beautiful

I simply love Heidi Boyd's style and her new book Wired Beautiful exemplifies her wonderful design sensibility. Not only are the designs all pieces I'd like to wear, there are some really cool techniques she shows you how to do. Me being me, I had to mix them up.
She did some really cool crocheting with wire and knitting with Soft Flex designs. I thought I'd try crocheting with Soft Flex. This bracelet is what I came up with. It kind of reminds me of the weird sculptures you can make with those magnetic marbles or atomic structures.

This is how I made my Soft Flex and bead crochet bracelet.
-I gathered up some old necklaces that had a wide variety of sizes black beads, .019 Medium Stainless Steel/ Nylon Coated Soft Flex, and some crochet hooks.

(Yes those are another pair of ping pong eyeballs I made in last week's post hangin' out watching)

-I cut the necklaces apart and strung the beads onto the Soft Flex (about 35) in a random order of sizes.
To keep the beads and the the stitches from coming undone I put a small piece of Scotch tape on the end.
-Then I simply did a chain stitch sliding one bead up within each stitch. This is what it looked like with the stitches very loose. I ended up liking it when I pulled the stitches really snug and used a smaller hook(I/9). All that was left to do was secure the ends together and I can slip it over my hand because there is a nice bit of stretch and give.

Want to see an inside peek into her book? Pop on over to this post at her blog for a double loop earring project.

So if you in the mood for a new book packed full of all sorts of wiring inspiration and tutorials grab yourself a copy of:
Wired Beautiful:
30+projects to hammer, coil, spiral and twist
By
Heidi Boyd

More about the book from North Light Books:
"Wired Beautiful features 30+ projects that will get you excited about the many ways you can use wire in your jewelry projects. Best-selling author Heidi Boyd takes you through the ins and outs of working with wire for your jewelry designs. You’ll learn how to make wire do your bidding in four detailed chapters: Spiraled & Coiled, Linked & Hammered, Wrapped & Bundled and Knotted & Stitched. Each project includes clear step-by-step photos and detailed instructions.

With Wired Beautiful, you’ll discover:

Unique techniques. Introduces traditional wire techniques, but also new methods not typically found in wire-jewelry books, such as using a knitting spool, creating cages and flower shaping.

Fresh designs and great basics. In addition to the 30+ projects—including bracelets, earrings, necklaces pendants and rings—you’ll learn basic jewelry-making techniques you can use in your own designs.

Easy-to-find materials. You’ll be introduced to a range of materials you can easily find at your favorite online and local craft supply retailers.

Let Wired Beautiful wrap you up in great jewelry!

About the Author

Heidi Boyd is the author of eleven North Light books, most notably the Simply Beautiful series. She has a degree in fine art, and her goal is to make sophisticated design approachable and easy for all. Her work has been featured most recently in Stitch magazine, in Better Homes and Gardens Holiday Crafts, and in Amos Crafts n Things. "
Blog Widget by LinkWithin