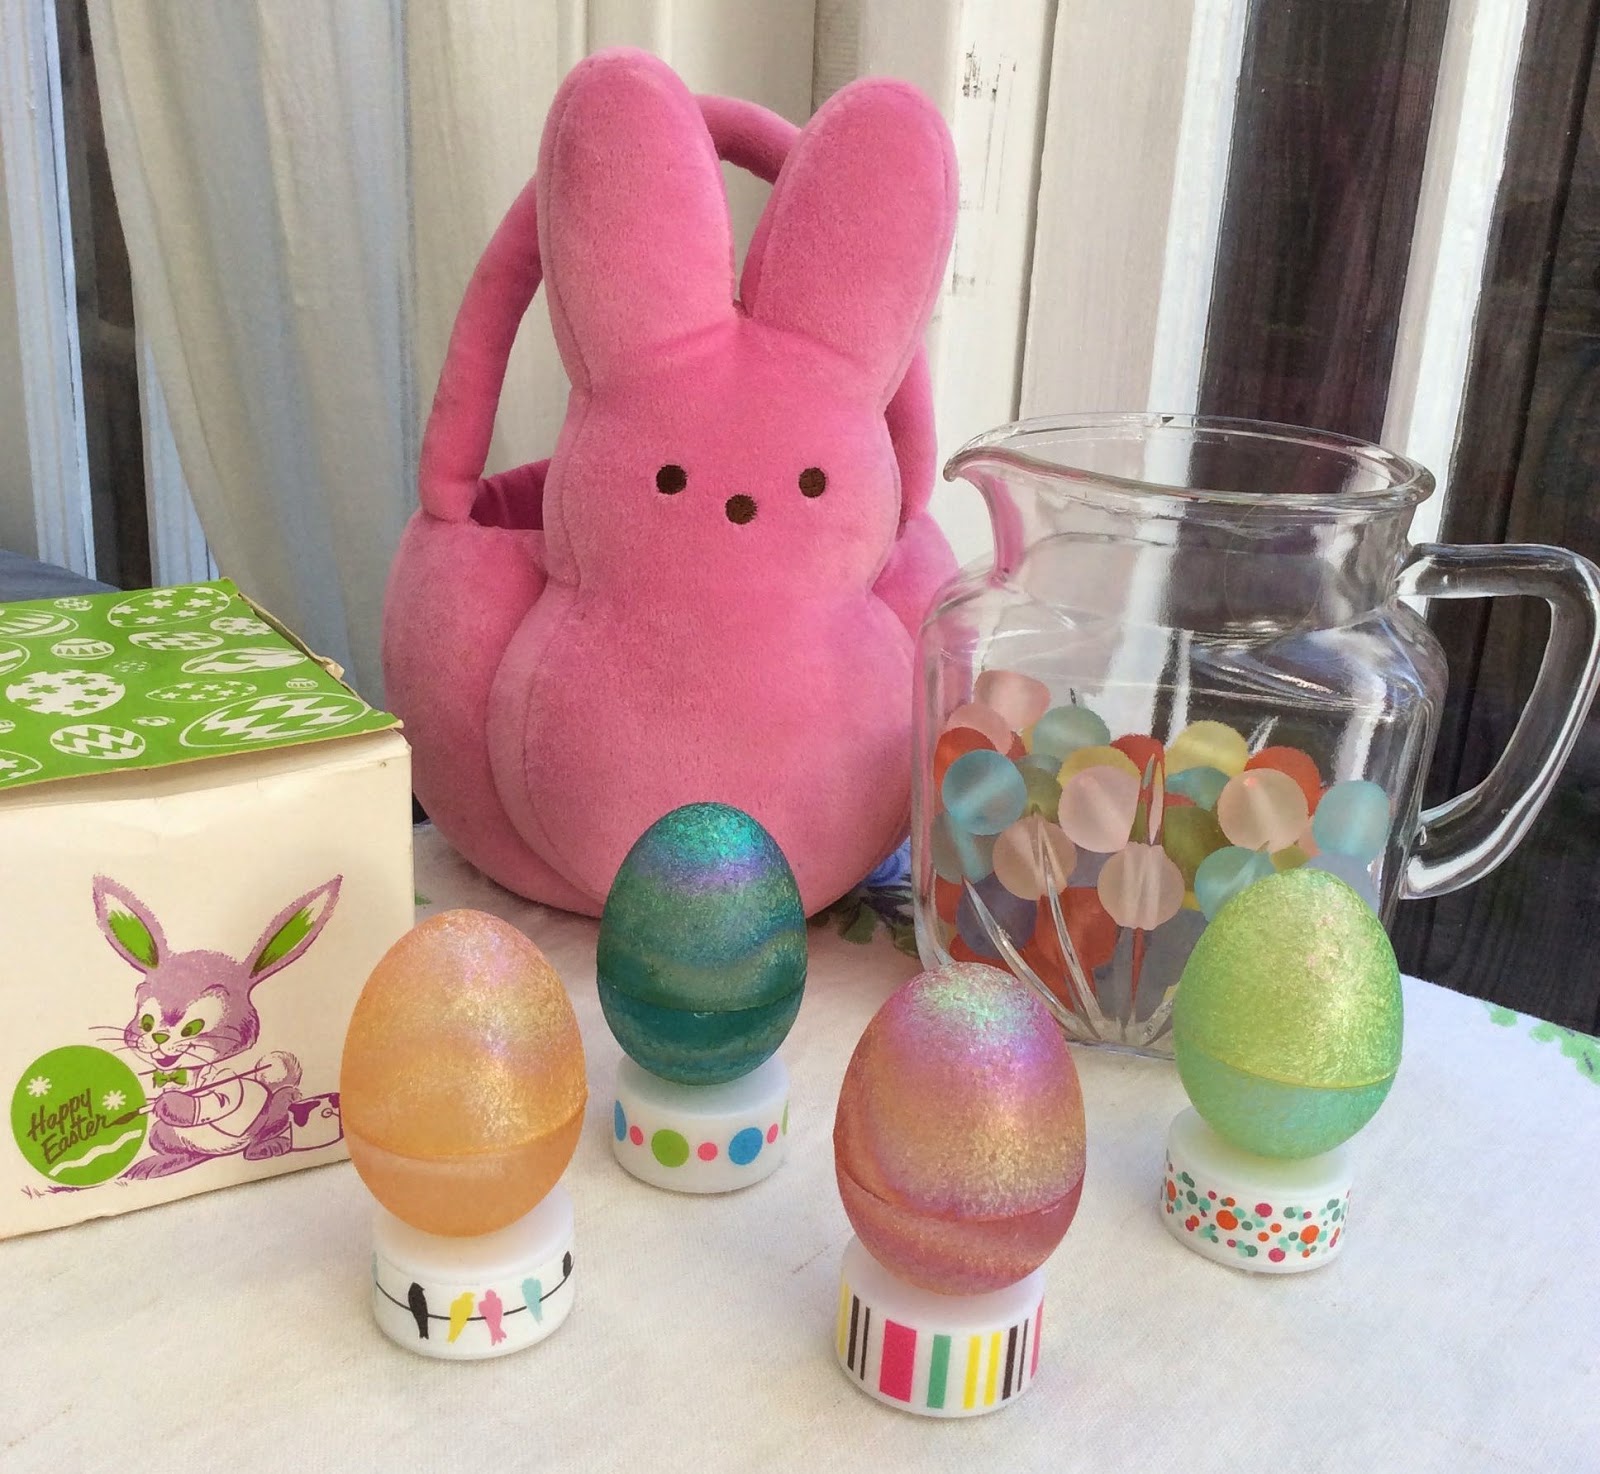
I'm kind of in love with those little battery operated tea lights. I used them to make illuminated large crystal Easter eggs featured over at Craftside. I made this set with smaller plaster Easter eggs that have a glitter surface.
I decorated the base of the tea light with a strip of washi tape.
I tried several different ways to drill the hole in the bottom of the plastic egg. I cracked a few. The best way I found was to use a cone shaped sanding bit on my Dremel.
I used a bit of hot glue to attache the eggs to the tea lights so they would stand straight up.
I have had these beautiful sick green colored beads for so long but couldn't figure out how to make a pair of earrings with them because the holes in them went sideways and I don't really like wire wrapping. Well, I finally figured out a way to hang them and I thought I'd share it with you.
Here are some of my first attempts that I didn't like.
1. I tried to use a giant jump ring, I couldn't make it symmetrical and I chipped a bead doing it.
2. I tried the wire wrapping but just convinced myself I didn't like it.
3. I tried a loop on each end and thought maybe I would hang a chain but still thought that would be too big/fancy.
4. My success!
Here is how I made what I am calling a double loop bead bail.
I threaded a piece of wire through the bead.
Then I bent the wire around the top of the bead and bent the two ends up to run next to each other.
Then I slid a small white bead over both wires and bent them out in opposite directions.
I then formed loops with both wires so that they aligned next to each other.
I trimmed each wire loop so that it wrapped around twice.
All that was left to do was link them onto the earring wires.
For more great jewelry making inspiration check out one of my all time favorite inspiration books
A visual catalog for jewelry, bead artists, and
crafters for hundreds of ideas at their fingertips to inspire their own
projects.
1,000 Jewelry Inspirations
is a stunning showcase of contemporary jewelry pieces that will feed
the creative appetites of crafters and jewelry makers everywhere. Become
inspired by this feast of color, sparkle, texture, dimension, and
clever, creative use of materials. From simple and elegant to beautiful
and elaborate “bling”styles, over 1,000 full-color images will be at
your fingertips to inspire your own creative projects. An exploration of
jewelry-making techniques will help even inexperienced jewelry makers
on their way to making beautiful jewelry.
This is just a cute and simple fun way to make a recycled bunny bookmark with the tab from the box of Annie's Macaroni and cheese. These could be a cute Easter project to use in a bunny story book.
Simply cut the side tab out along the corners of the box. Then very carefully with an x-acto knife cut the perforated lines on the box. Yup, that simple. And as you can see the little bunny ears stick out above the top edge of the book and look so cute!
I will be making some projects from this super cute The Paper Hat Book: Super Hats for Super Kidsbook that include a lot of recycled materials like food boxes and pother pretty packaging.
Hats
are pure fun and the perfect item to cap off any costume or ensemble.
The right headgear ensures complete transformation, especially on the
head of an imaginative child.
The Paper Hat Book offers
creative families 20 fantastic paper hats, all of which can be created
quickly and easily from readily accessible papers: shopping bags,
newspapers, comics, recycled story books, magazines, packaging scraps,
and junk mail!
Artist and designer Alyn Carlson creates
hats that are perfect for birthday parties, playdates, costumes, and
everyday dress up. Each hat can be styled to perfectly suit the wearer
by merely selecting the right paper and colors. The hat themes range
from Floral Flappers to Viking Warriors, and from superheroes and
pirates to beautiful butterfly hats.
Alyn Carlson is an
artist, designer, stylist and part time chicken rancher living in a
converted church who believes in setting the table for the muse. Always
in search of the line, font, pattern, seed, flavor, musical note to be
placed at the right time in the right place. As a paper artist, her
extraordinary hats, suitable for children and adults for a garden party,
whimsical wedding, a paper-lover's birthday party or just-because, have
been featured in countless blogs and in the current issue of Uppercase
Magazine. Alyn is also featured in the best selling Design Sponge book.
I love crafting for holidays and it's never to soon to start making little embellishments like this fancy shamrock for the bookThe Complete Photo Guide to Crochet, 2nd Editionfor St. Patrick's Day.
F A N C Y S H A M R O C K
Skill Level: Intermediate
Ch 6, join with a Sl st to form a ring.
Rnd 1: Work 18 sc in ring, join with Sl st to first sc.
Rnd 2: Ch 1 (counts as first sc now and throughout), skip first
sc, 1 sc in each sc around, join with Sl st to beg ch-1.
Rnd 3: Ch 1, skip first ch, 1 sc in each of next 5 sc, [ch 10,
1 sc in each of next 6] twice, ch 12, join with Sl st to beg ch-1.
Rnd 4: Ch 1, skip first ch, 1 sc in each of next 4 sc, [22 sc
in next ch-10 space, 1 sc in each next 5 sc] twice, 24 sc next
ch-12 space, join with Sl st to beg ch-1.
Rnd 5: Ch 1, 1 sc in next 4 sc, *[ch 4, skip 2 sc, Sl st next
sc] 7 times, sc in next 5 sc, rep from * once, [ch 4, skip 2 sc,
Sl st next sc] 8 times, join with a Sl st to beg ch-1.
Rnd 6: Ch 1, skip next sc, 1 sc in next sc, [5 sc in next ch-4
space] 7 times, skip next 2 sc, Sl st in next sc, ch 18 for stem,
1 sc in 3rd ch from hook, 1 sc in each of next 15 ch, Sl st
in next sc on Main Motif, [5 sc in next ch-4 space] 7 times,
skip next 2 sc, 1 sc in next sc, skip next 2 sc, [5 sc next ch 4
space] 8 times, join with a Sl st in first sc, end off.
By Margaret Hubert
This is a comprehensive reference book on all aspects of crochet.
This
book provides a reference for all methods, including Tunisian,
intermeshing, broomstick lace, hairpin lace, and freeform crochet.
Includes step-by-step instructions for all the basic stitches and swatches of 100s of stitch patterns with completeinstructions. Now with:
15 all new projects
20 new stitch patterns (220 in all)
Expanded basics
Hundreds of tips and ideas
Margaret Hubert designs for yarn companies and book and magazine publishers including Crochet, Interweave Press, Quick and Easy Crochet, Crochet Fantasy, and Belle Armoire.
She teaches at yarn shops, retreats, and national gatherings and rarely
misses a national conference in the needle arts field. Among her
specialties, she is a master at freeform crochetand knitting. She is the
author of many books and currently resides in Pawling, NY. Visit her
online at http://www.margarethubertoriginals.com and http://margaretshooksandneedles.blogspot.com.
I am always looking for fun ways to use my fabric stash and create pretty storage in my home. Today's recycled wine crate foot stool project does just that!
The cushion top is made with Foamology Twelve Piece Design Foam and 12 of my favorite quilt fabric pieces along with some scrap wood, buttons and 4 wooden ball feet.
My wine crate wasn't the exact size of the Foamology Twelve square Foam piece so I made the lid a bit bigger. I didn't know exactly how much extra puffy the foam would be with the fabric on it so I decided to cover it first before I made the frame lid.
I wanted to fussy cut some of the fabric to include images and text so I made a velum template.
Once my foam was covered I measured it and cut some strips of wood to make the frame and a piece for the lid base.
I glued the frame together and made sure it was square with my quilt ruler and the lid base as a guide.
Then I put the cushion into the frame and glued it down to the lid base holding it secure with a c-clamp on each corner.
I glued dice on the underside of the lid in each corner so that the lid would not slide around.
To embellish the cushion frame I cut the shanks off of a variety of buttons USING EYE PROTECTION!!!!!! as the shanks can go flying even if you are holding the button with the shank side down.
I made 4 rows of buttons to make sure I had a nice variety for each side. All that was left to do was glue the buttons around the frame border and the ball feet on the bottom of the wine crate.




 Posts
Posts


